Nice write up hopefully u get the deuce running
how to tear down and rebuild a Mitsubishi TD06 20G turbo
Collapse
X
-
ok, so now its time to rebuild! once you have it all torn down, make sure everything is clean. if you have a parts washer, etc. use it. make suree all corrosion/carbon etc. is out of all the creack and crevices. next, its time to take out your rebuild kit, and throw this thing back together91 MR2 Turbo
08 Audi A4 S-line

Comment
-
the first step of the rebuild is preperation. clean your hands/working space. get a cold drink. make sure you have all the tools, parts, towles accesible. you want to make sure this process goes as smoothly as possible. dont want to rebuild it again do ya!?
also, along with your rebuild kit, your going to need either some assembly lube, or some conventional motor oil for the assembly. i used Lucas assembly Lube. its thick and works well. your gonna use it on most of the parts internally91 MR2 Turbo
08 Audi A4 S-line

Comment
-
now that your prepared, lets begin. start with one of your fresh new bearings. these are a bronze color, barrel shaped, and have oil holes around the outside for lubrication. use your assembly lube(or oil) to lubricate the bearing all over, then carefully place it in the center housing.
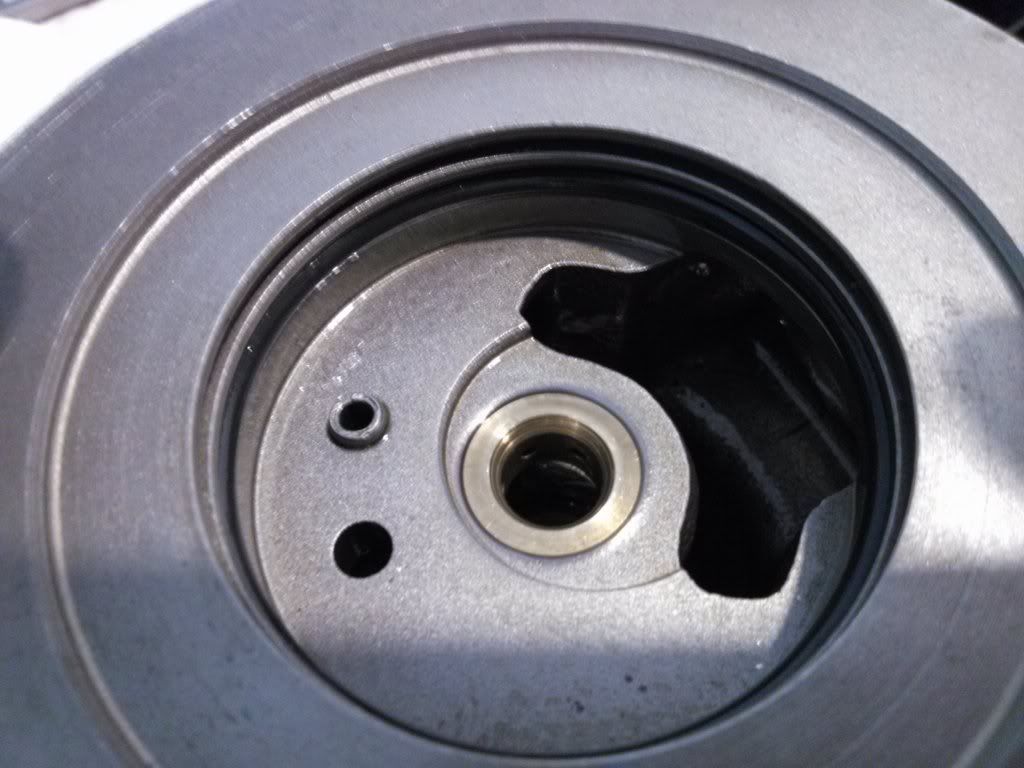
next set the thrust plate collar in place. the kit i got, has an upgraded one so it is larger. heres a pic of it in place, and compared to the old thrust plate collar. lubricate this as well
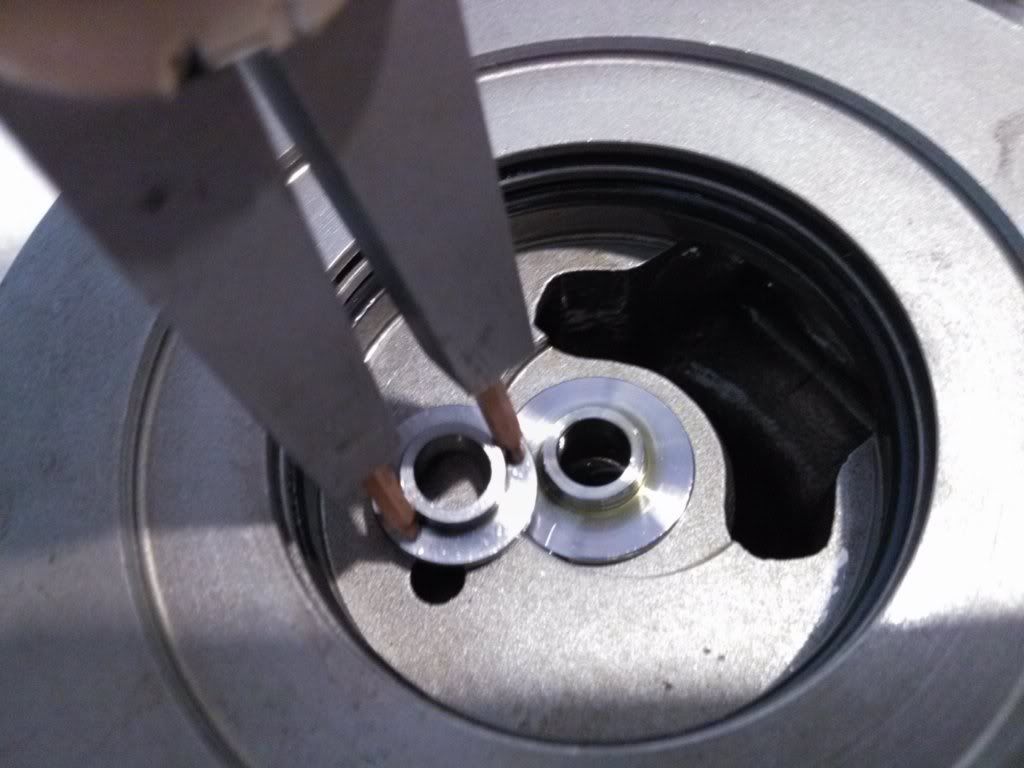
next, its time to install your thrust plate. my kit also came with an upgraded one of these as well. heres what it looks like compared to the old one
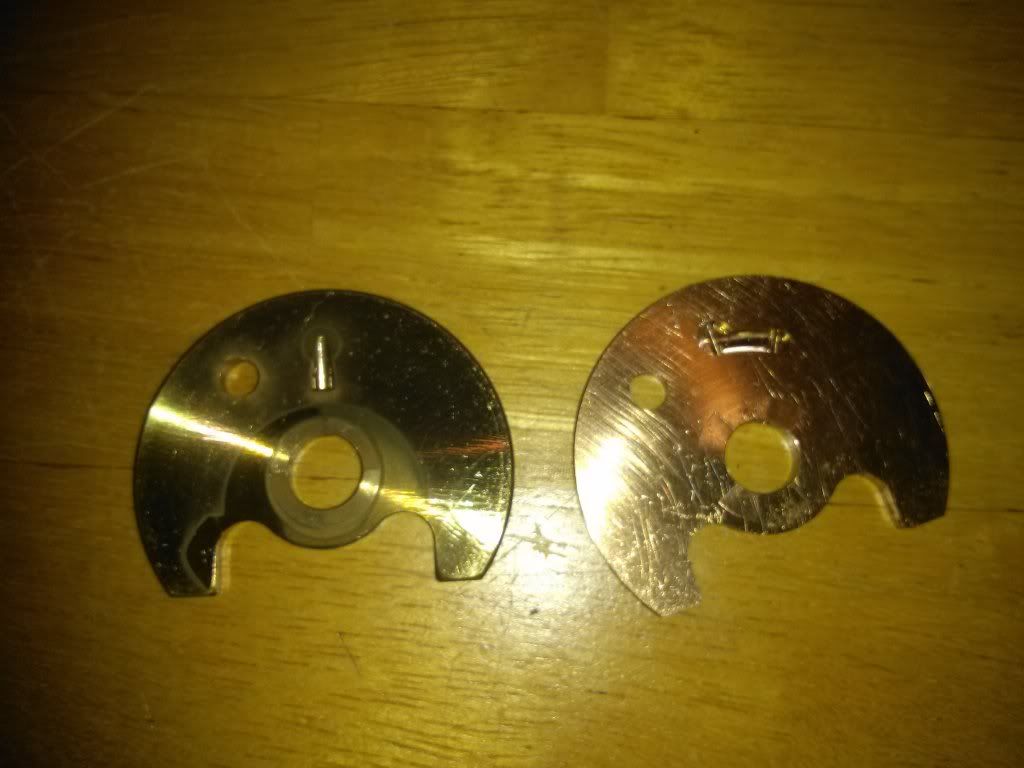
install it with the oil gallery facing DOWN. the small noth on the face of the plate, is the oil gallery that will feed oil underneath to the vital parts. heres a pic of it installed. this is what you should have. it doesnt hurt to get some lube on there too
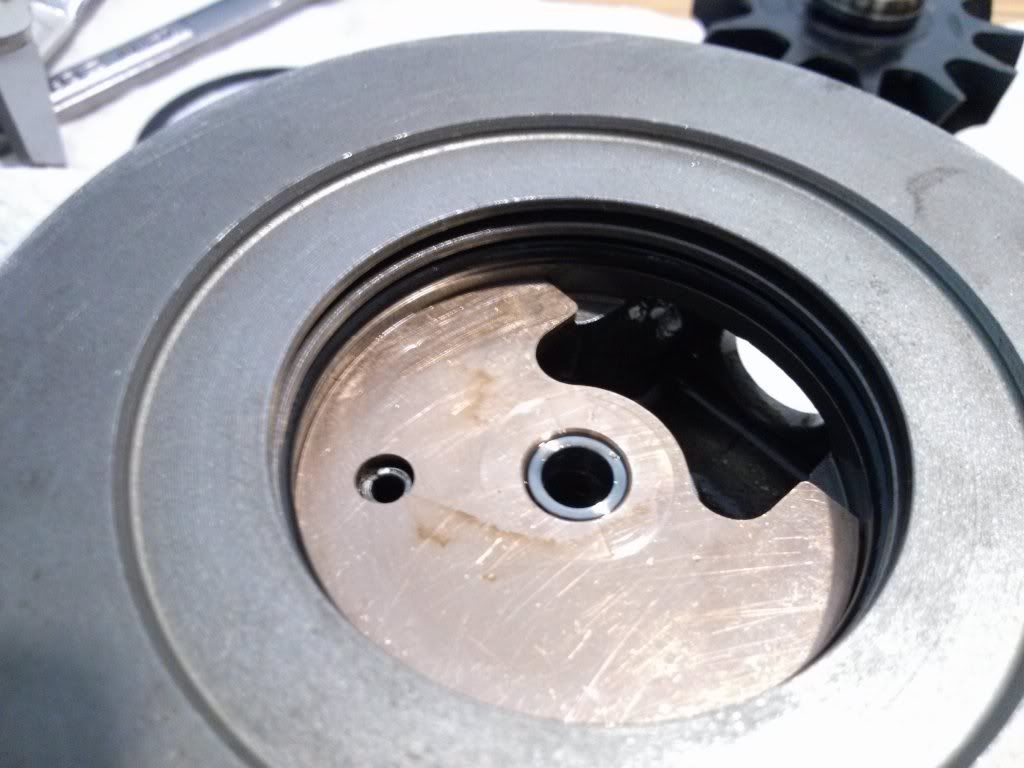
Also, notice in the last picture, the black rubber O-ring. of course, replace that as well with the new one from your kit. to make things easier for the next step, get a little lube on your finger, and put some around the o ring lightly. after, its tome to wash your hands, because they are likely messy, and get ready for the next stepLast edited by NHMR2; 11-18-2012, 08:02 PM.91 MR2 Turbo
08 Audi A4 S-line

Comment
-
now that you have the previous steps complete, its time to put together your thrust bearing/piston(oil) ring, assembly.
start by putting the carrier through the silver plate, with the bent tab section. make sure the tab, is facing down. you will see in the pictures how it should look. once its through, take the small piston ring (compressor oil seal) and "walk" it on very carefully. just as you did to remove the old one.
heres a pic of it all together
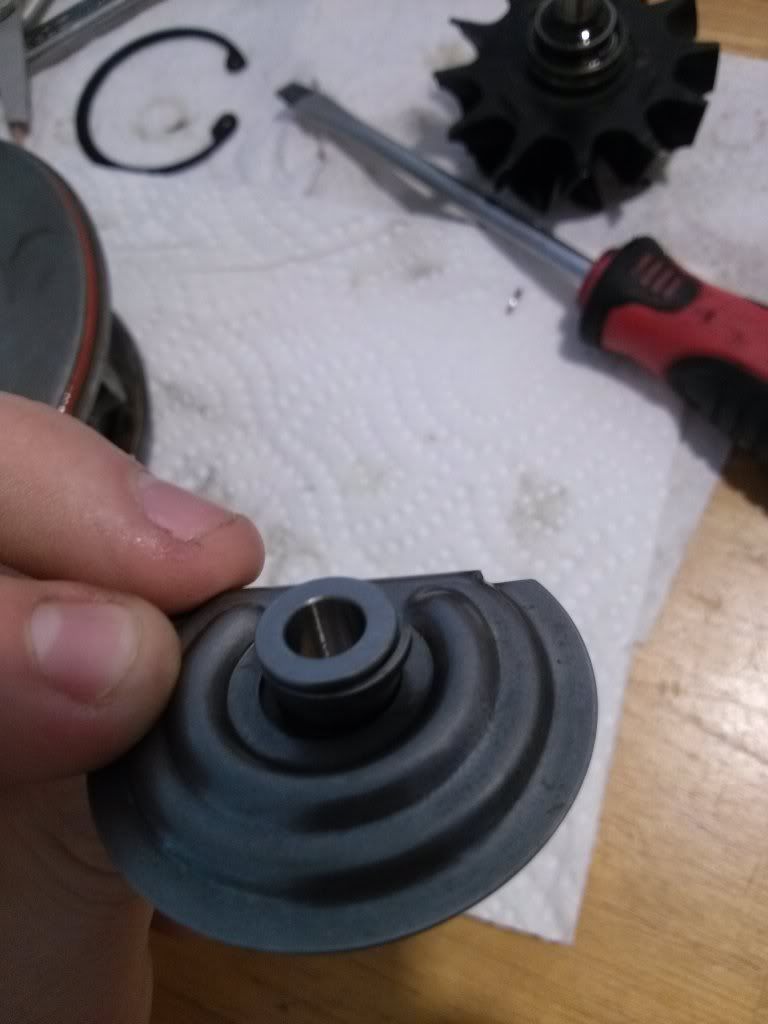
the next step can be a little tricky. take the assembly, and take your new oil shield. you will slide the oil shield onto the assembly, compressing the piston ring. dont be shy to use a bit of lube on everything!
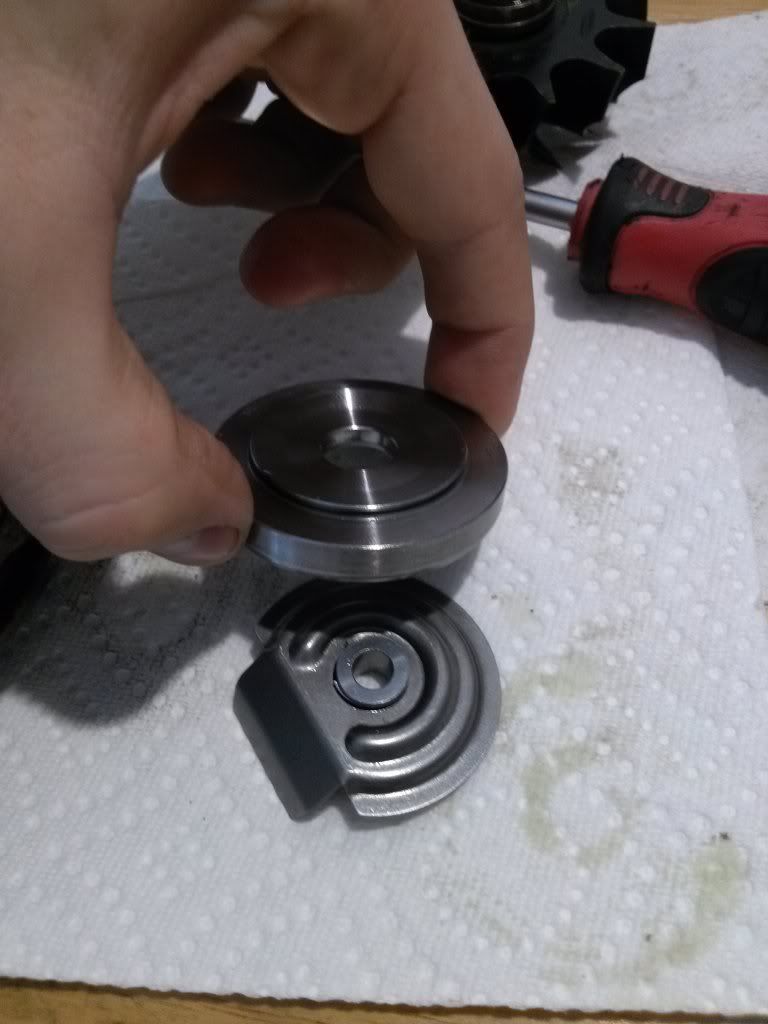
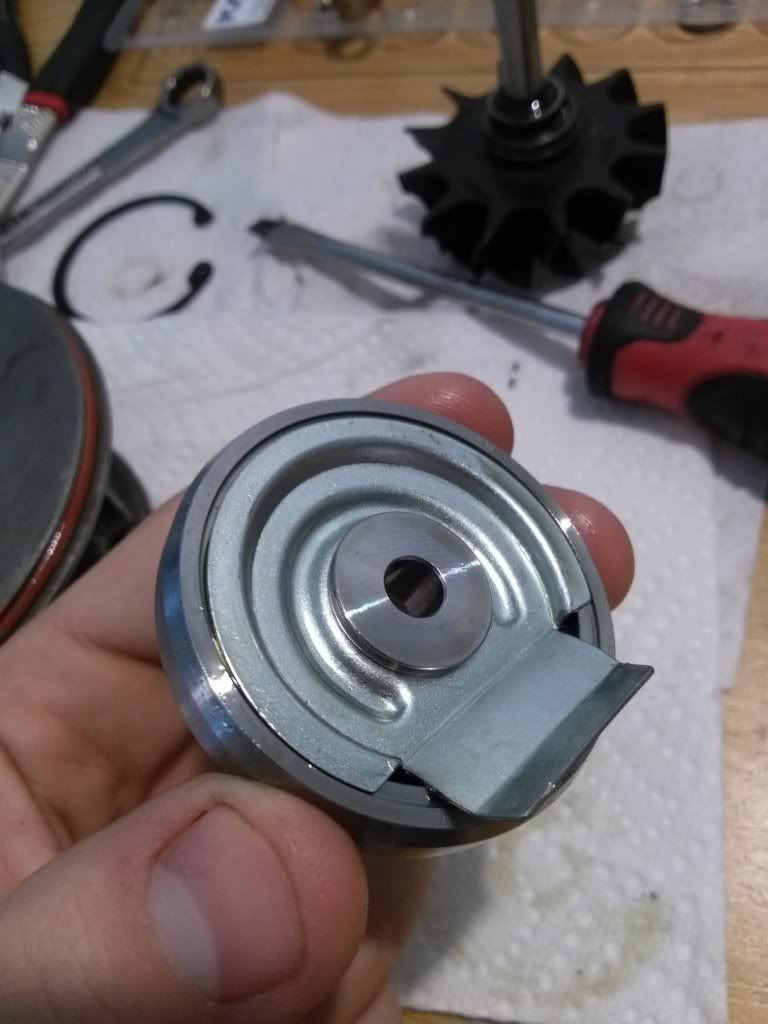
when installing the oil shield, try to be as centered, and square as possibly. lightly press the shield over the ring, and while turning, apply a bit of pressure. the ring should compress and it should all pop together. (this ring is the easy one!)
after this is what you should have. view is of the bottom
once you have that all together, its time to pop it into the center housing. line up the tab on the bottom, into the space of the thrust washer
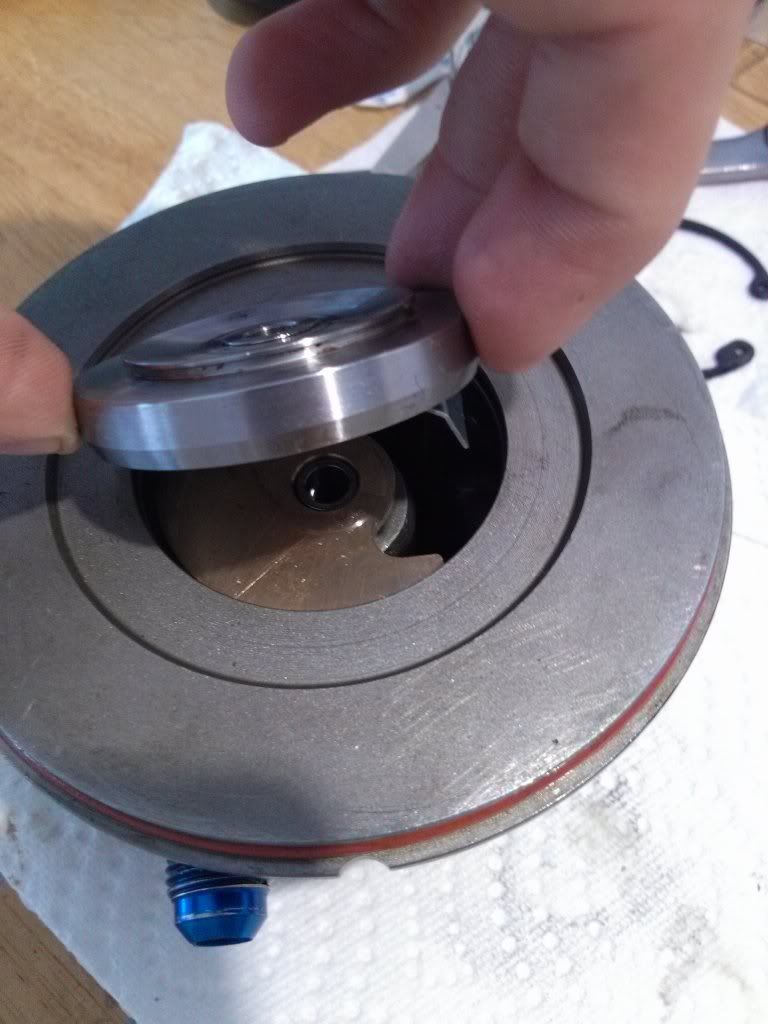
when installing, this is where lubing up the Oring helps. put the whold assembly you just put together and press down straight and firmly. it should pop down into place. this is also the easier oring to deal with. once in, here it is. next is to install the snap ring to hald it all secure
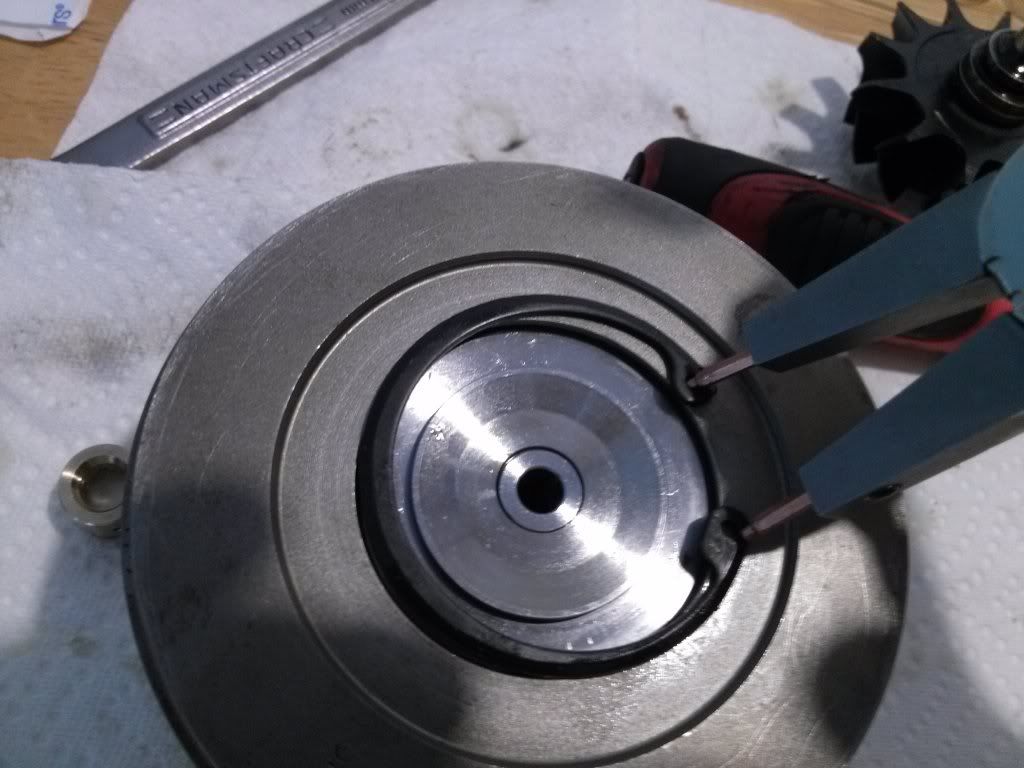
make sure with the snap ring, that the tapered side is facing UP. use your snap ring pliers to install it into place. after that, the compressor side internals are good to go!
use this time to install the big O-ring around the outer edge of the compressor-side of the center housing. you can also see the mostly completed center housing in the photo
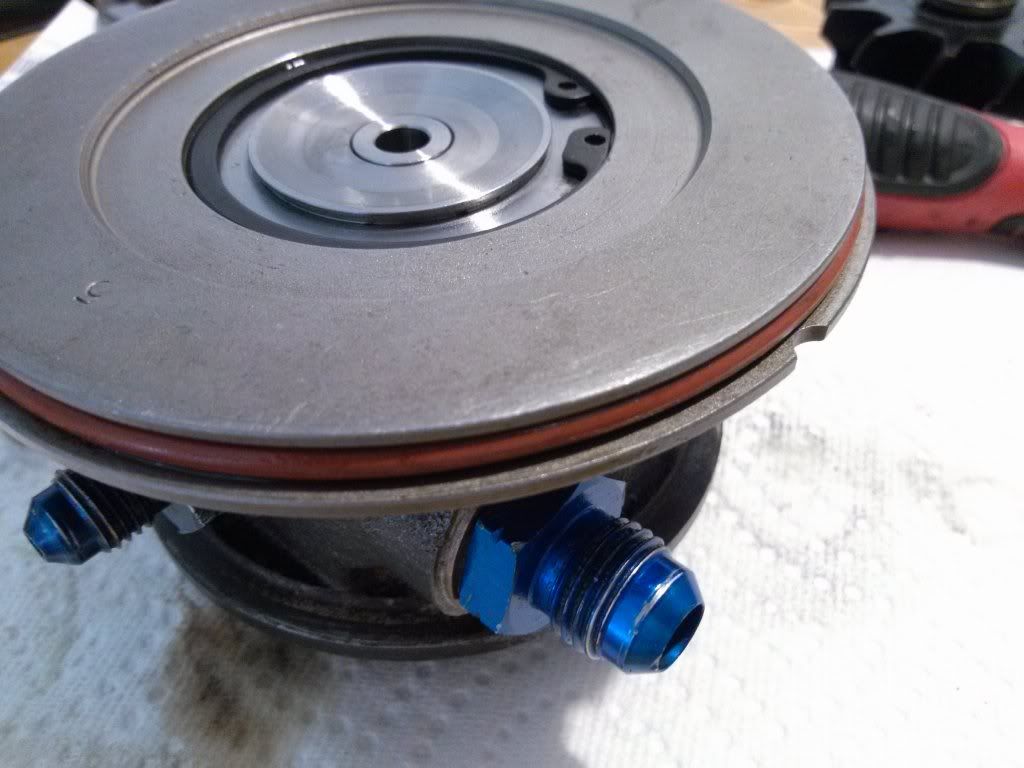 91 MR2 Turbo
08 Audi A4 S-line

Comment
-
now that your done with that, its time to move onto the turbine side. this is more difficult, dirtier, and more of a PIA. at least it was for me...
the first step is to take your turbine shaft, and make sure the grooves etc. are as clean as possible. remove all carbon/debris etc. possible. pay close attention to the groove the ring sits in. very important.
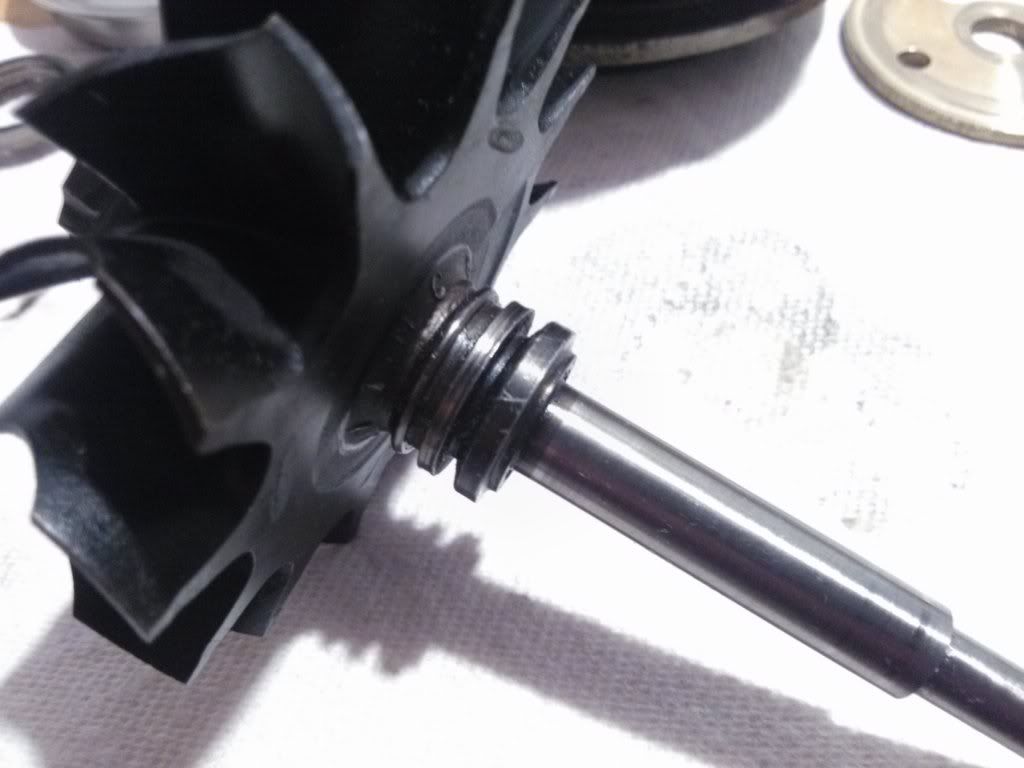
*note** during all of these next processes, use some amounts of lube here as well. also, i neglected to snap a picture, but i think its self explanatory, place your new journal bearing (turbine side) into the center housing. using plenty of lube (oil).
then install the bigger piston ring (oil seal) from your kit. use the same "walking technique" from groove to groove, minimizing flex of the ring. this ring is difficult and sensitive and keeping the ring gap small is imperitave. once installed in its groove (groove closest to turbine wheel) this is what you should have

once that is in, this is where things get tricky. take a drink, get calm and get ready. this could be easy, or could be VERY tedious.
its time to get the ring compressed and into the housing. now, if your turbo is like mine, and has a collar that is sepearate from the housing, i found it easiest to install outside of the housing and then slide everything in. heres the collar im talking about
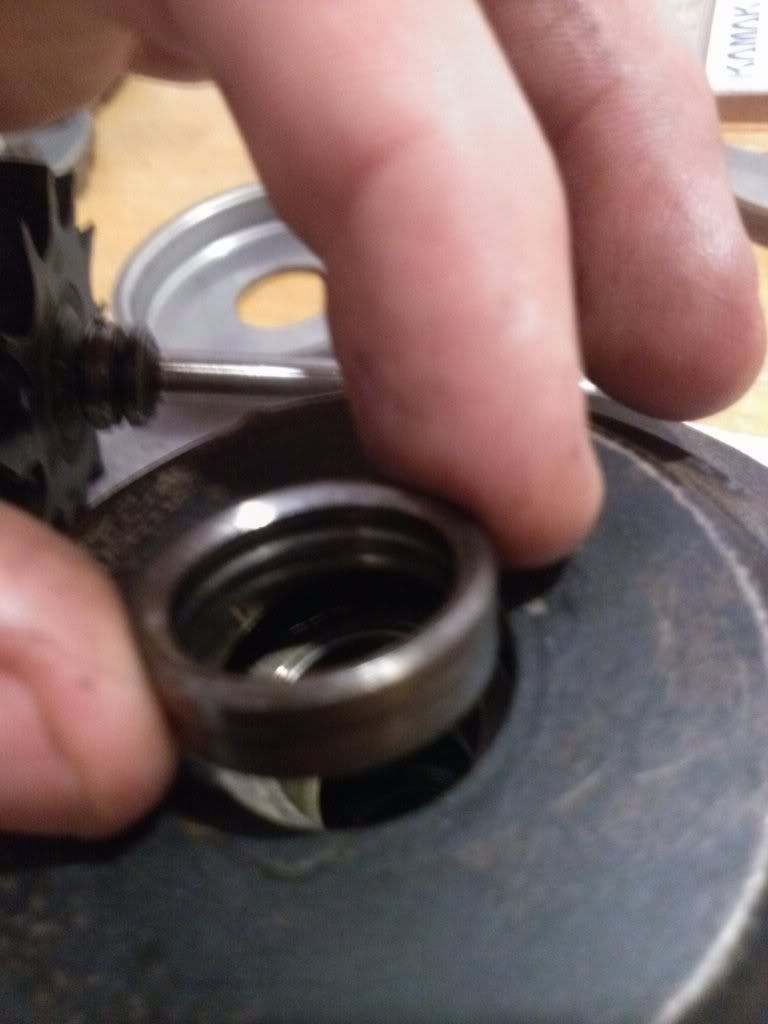
now, if your collar (or groove) is in the center housing or not, try to use a similar technique. basically, sliding the shaft into the housing and with a turning and some light pressure, press the shaft through so the ring compresses. it should lightly pop into place.
this may take time, and depending on your turbo, may require some intuition. (mine did)
once that in, and your shaft is throught the center housing pat yourself on the back. your almost done. (wipe your hands first)
next, slide on the compressor wheel, onto the shaft and find your new reverse thread nut that came in your kit.
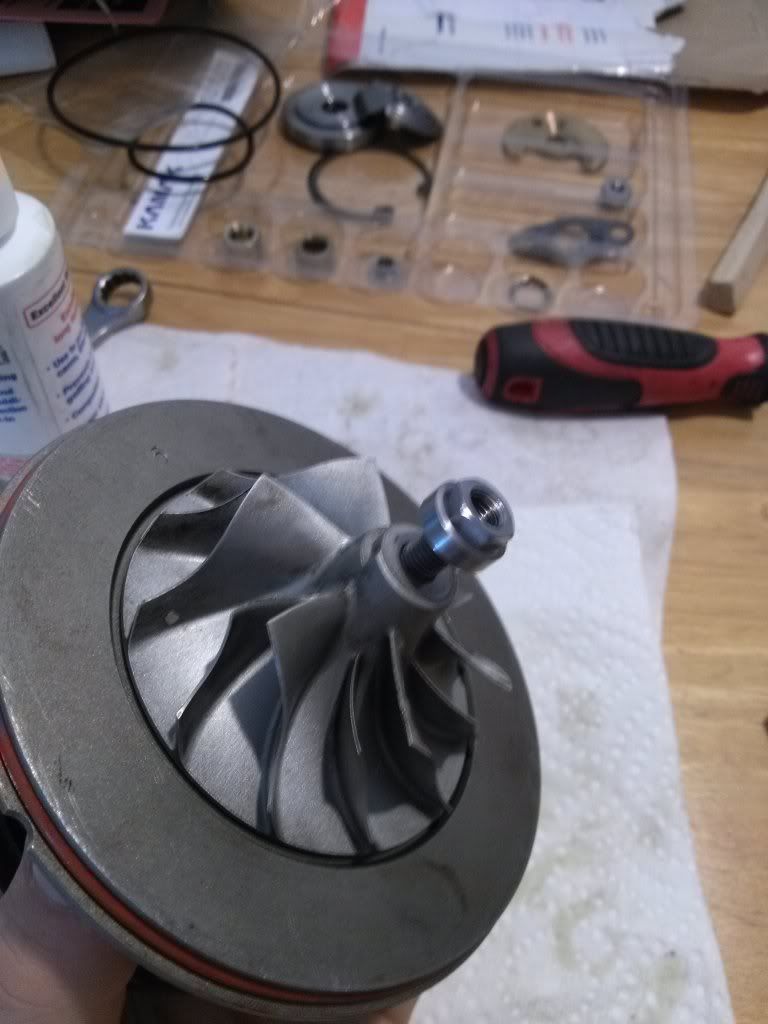
once it on, use your 14mm wrench, and 10mm socket, and tighten it all down. not too tight. you dont wanna mess up all your hard work and break things. its hand tight, and then another 90* basically. ill update specific specs later.
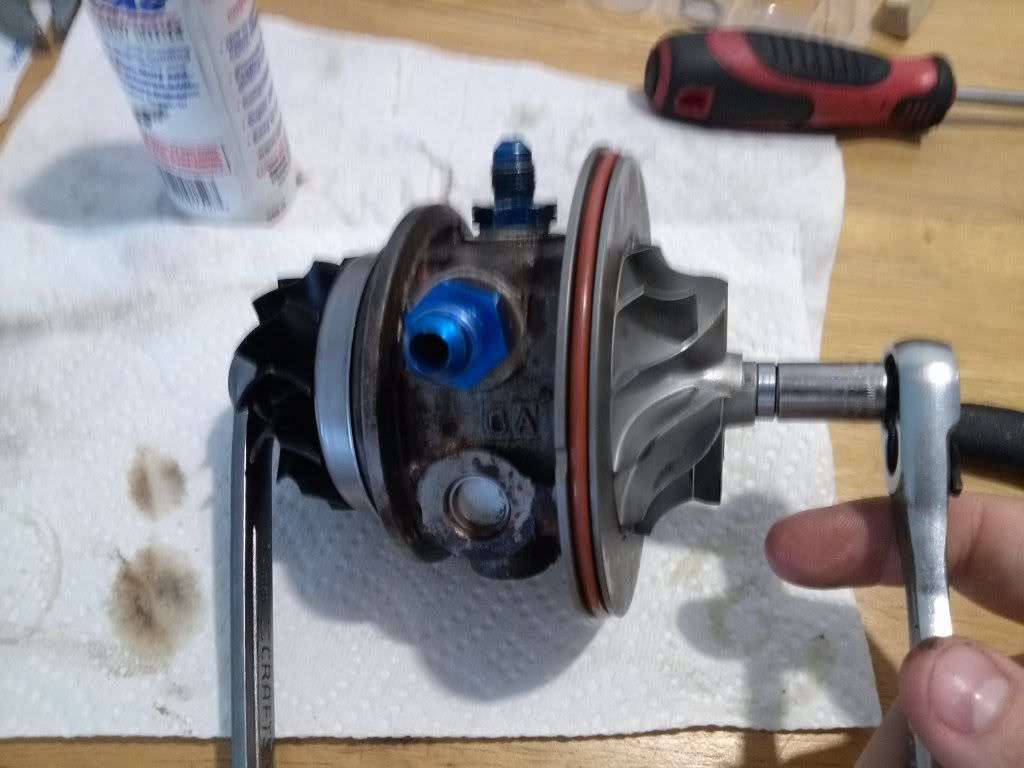 Last edited by NHMR2; 11-18-2012, 09:03 PM.91 MR2 Turbo
08 Audi A4 S-line

Comment
-
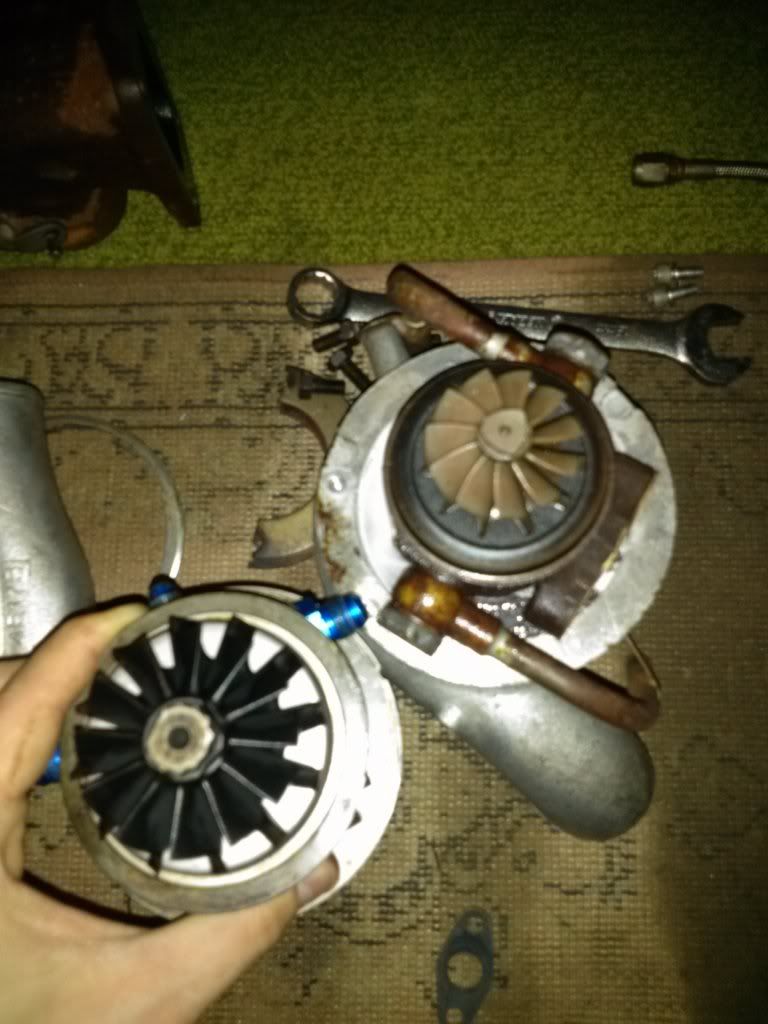
now go grab your compressor housing, and your big boy hands. heres what you got
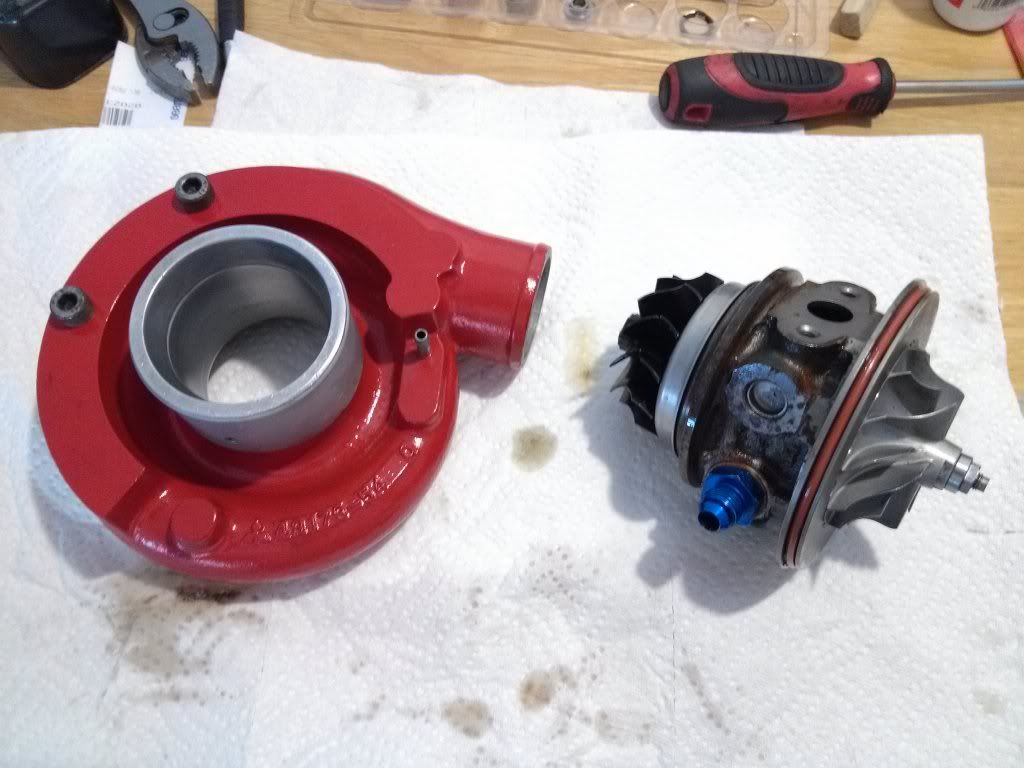
put your center housing (most importantly) your compressor wheel CAREFULLY into the compressor housing. pick it up and turn it to align roughly where your oil drain should be. then (this is somewhat difficult) press the center housing down into the compressor housing, to seat the big Oring you just installed. this takes a bit of force. dont be scared to use a little lube. we're all used to it right?
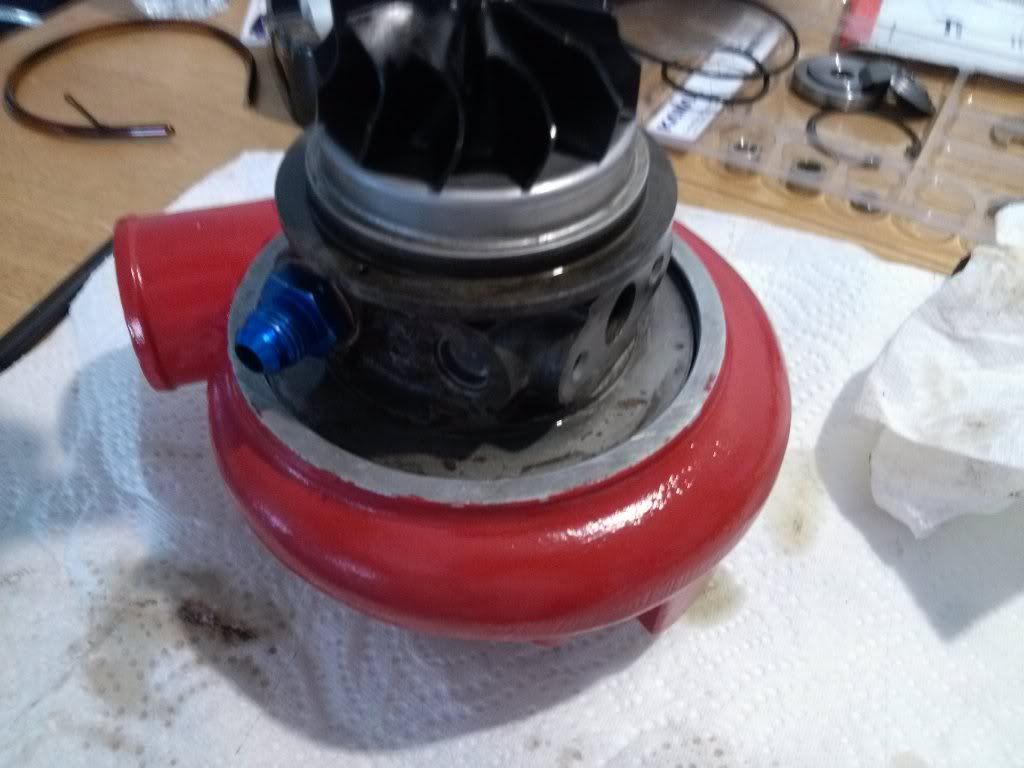
then, get your snap ring pliers out, and get ready to put in the big snap ring. it isnt easy. make sure the tapered edge is facing UP! here it is
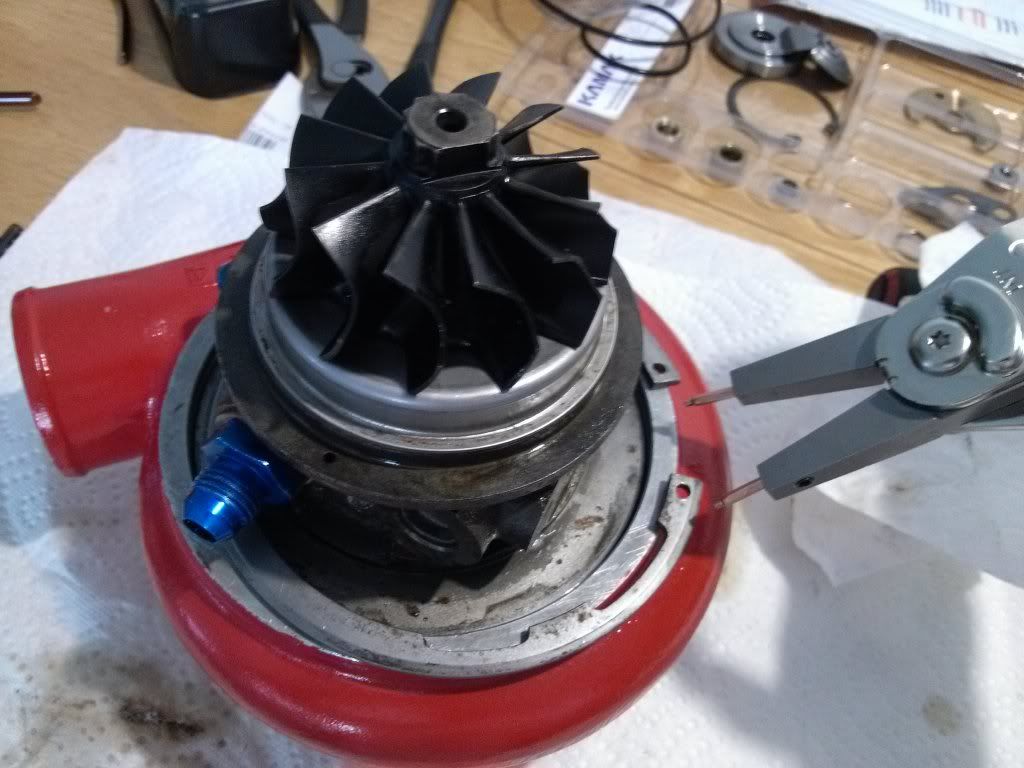
after you get it installed, get your turbine housing and your V-band, its almost done
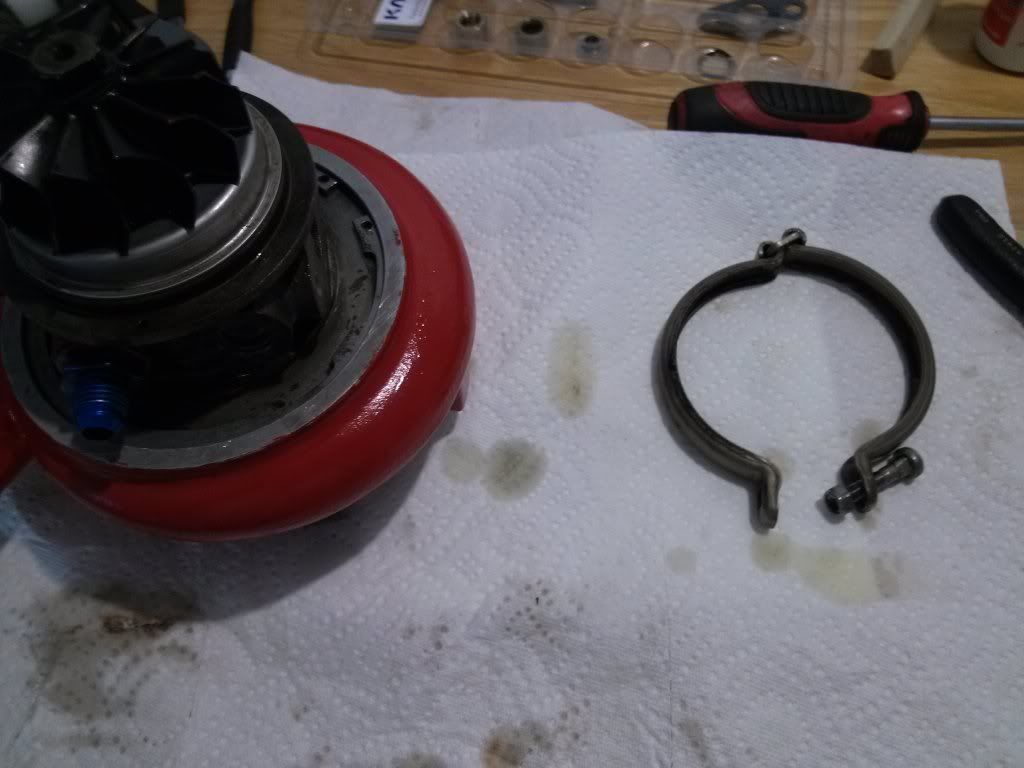 Last edited by NHMR2; 11-18-2012, 08:53 PM.91 MR2 Turbo
08 Audi A4 S-line

Comment
-
put the turbine housing carefully over the turbine and against the center housing.
then place the Vband around and tighten. i put mine to where it was accessible to further tweak fitment after its installed on the car.
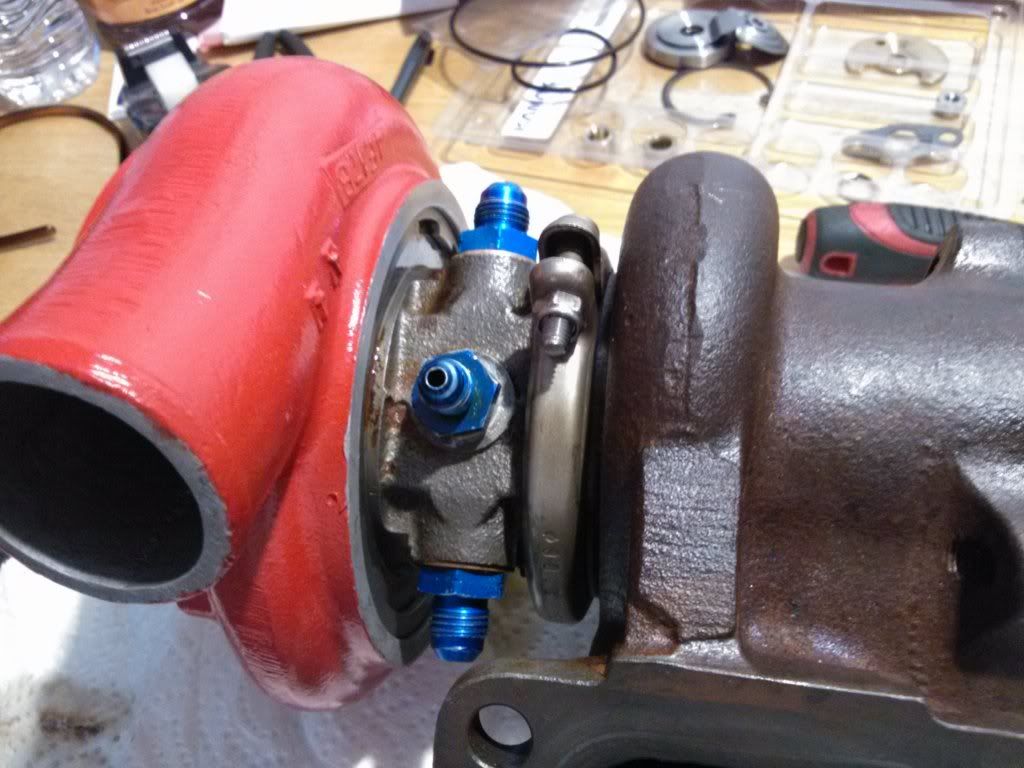
after that, BAM! turbo is freshly rebuilt!! i painted my compressor housing while it was off. i like the look. you can also get your turbine housing ceramic coated etc. i was going to but couldnt find a place that it would do it cheaply.
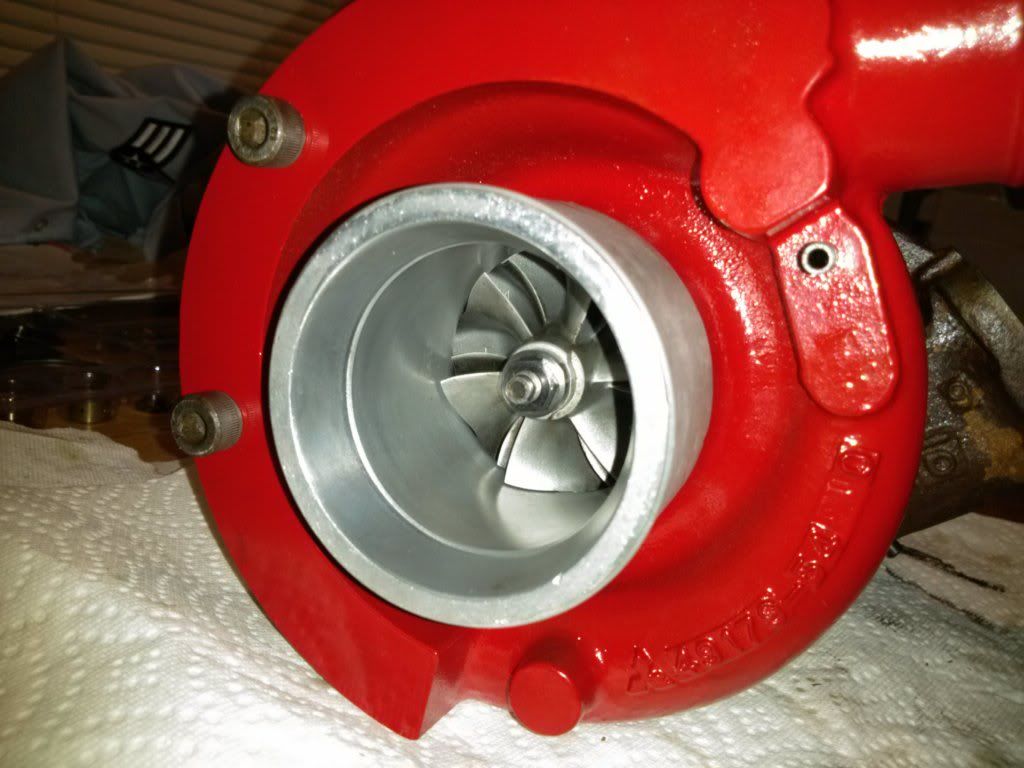 91 MR2 Turbo
08 Audi A4 S-line

Comment
-
-
Very nice write-up, Chris. I'd love to see more of these.Owner - Fully Assed Graphics
sigpic
PM me for vinyl graphics!
-Andy - Drunk Crew Member #003
2006 Mazda6s 3.0L V6 - Click here for my build thread... http://nemotorsport.com/boards/showthread.php?t=12369Originally posted by EuroTrashI can only imagine the conference calls and work that it took an engineering team to develop butthole seeking technology for this to accurately target a puckered starfish with a warm blast of water.
I'm sure a few have PTSD from testing.Comment
-
thanks! i neeeed projects right now... lol thats why i spent so much time with this 20g. one, to do it right, and two, because im bored as hell ALL the time... lol
anyways, ill post a couple more instructions just cause they're helpful.91 MR2 Turbo
08 Audi A4 S-line

Comment
Comment