how to tear down and rebuild a Mitsubishi TD06 20G turbo

Collapse
X
 
  • Time
  • Show
Clear All
new posts
  • NHMR2
    ~chris
    • Mar 2011
    • 4750

    how to tear down and rebuild a Mitsubishi TD06 20G turbo

    ok guys, figured id make a tech thread to show how to tear down and rebuild a mitsubishi TD06 20G turbo.

    (i believe these instruction can help with many other similar turbo's such as the TD05h and 14b and 16g turbo's and a couple more) take these instructions with a grain of salt, as i will try my best to explain things simply and thoroughly.

    first things first, some tools youll need.

    snap ring pliers
    flathead screwdriver
    knife or a small pick (for the old seals)
    10mm wrench or socket
    14mm wrench or socket
    paper towels of course


    first start off by removing the turbo from the manifold if you havent done so already.
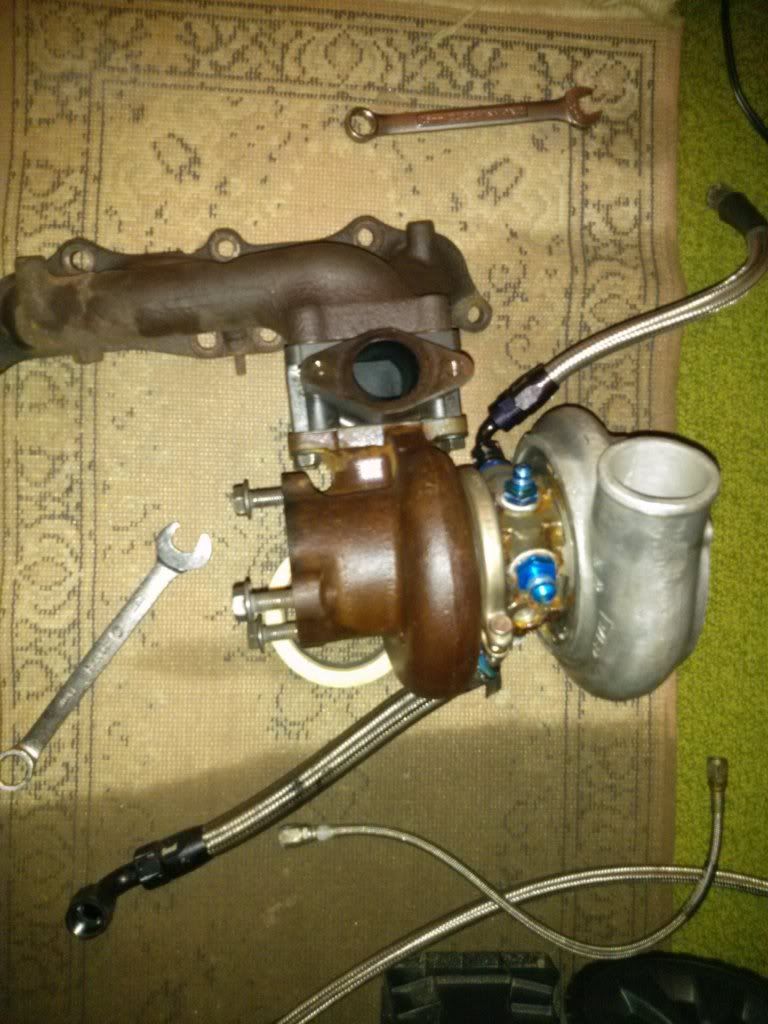


    then remove the oil/coolant lines. my 20g has AN fitting so it may be different from yours.
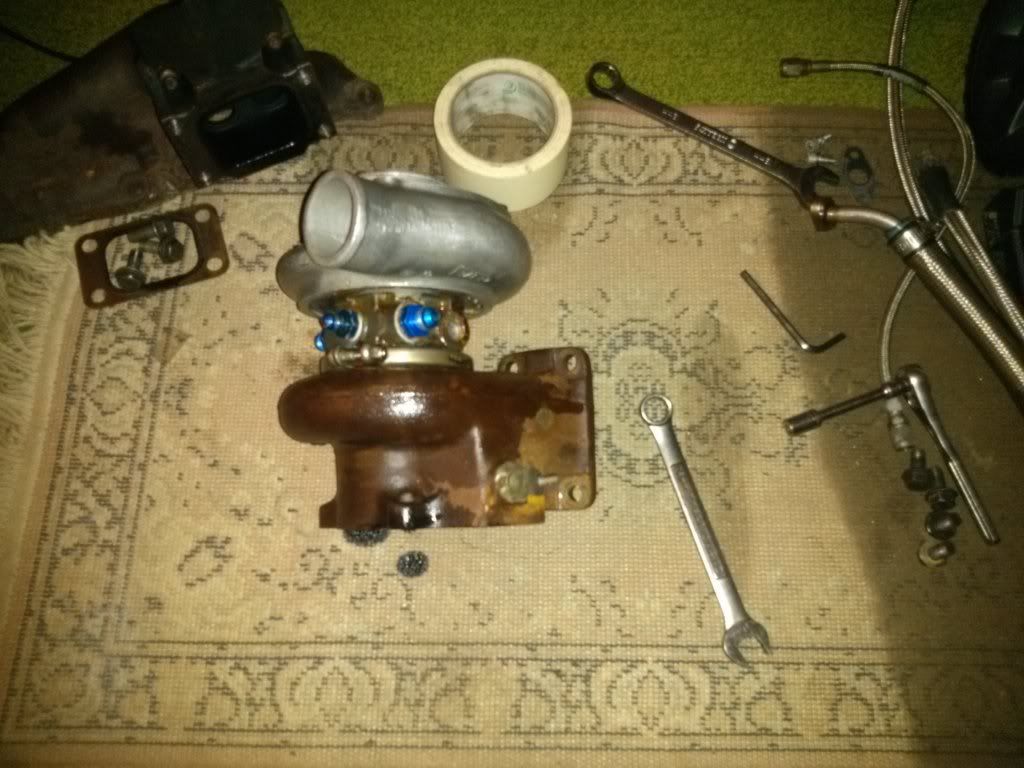


    next, remove your wastegate. there will be a boly holding the braket to the compressor housing, and also a small snap ring at the eng of the WG rod. my 20g has the WG welded shut because i have an external WG
    91 MR2 Turbo
    08 Audi A4 S-line
  • NHMR2
    ~chris
    • Mar 2011
    • 4750

    #2
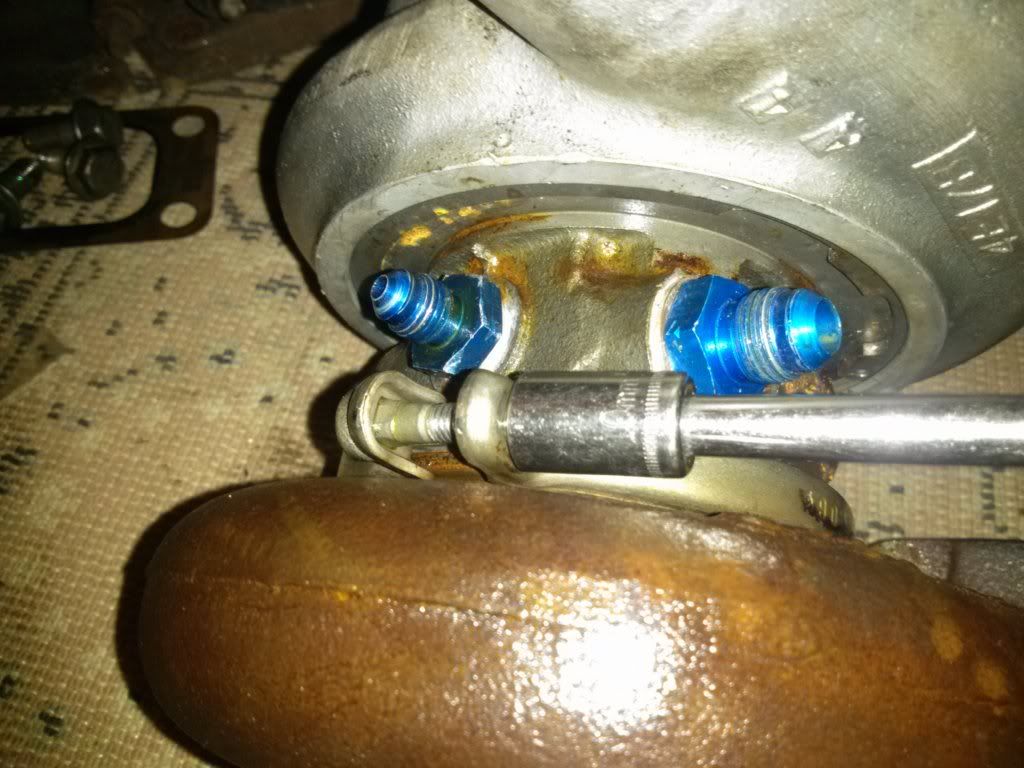
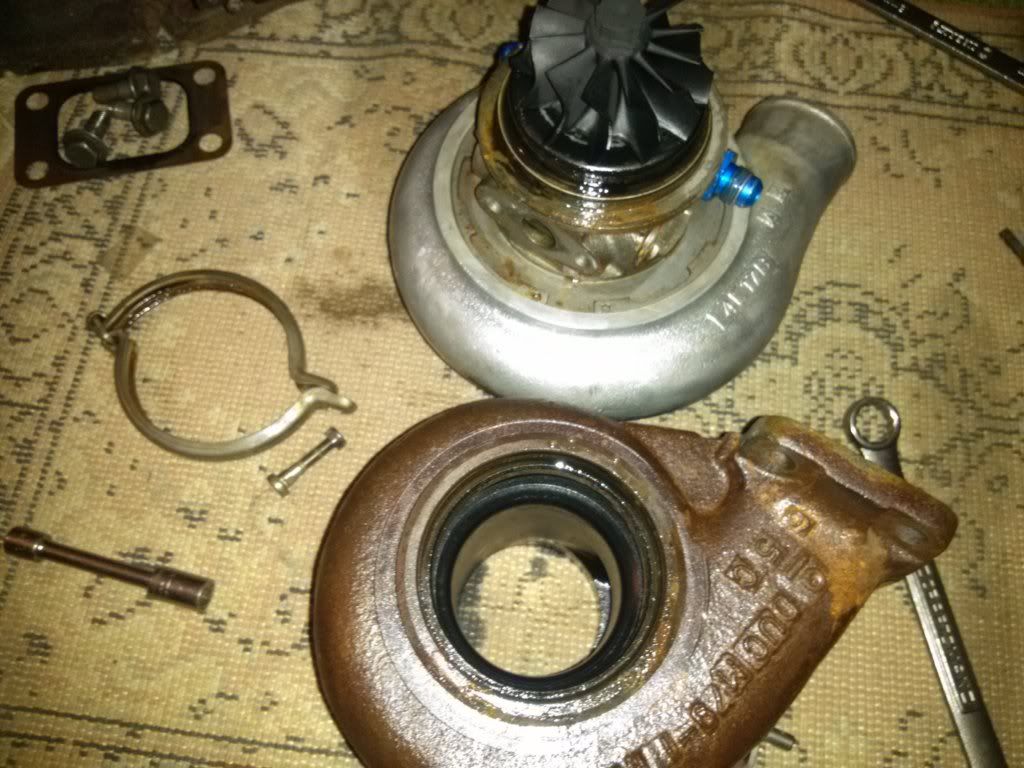
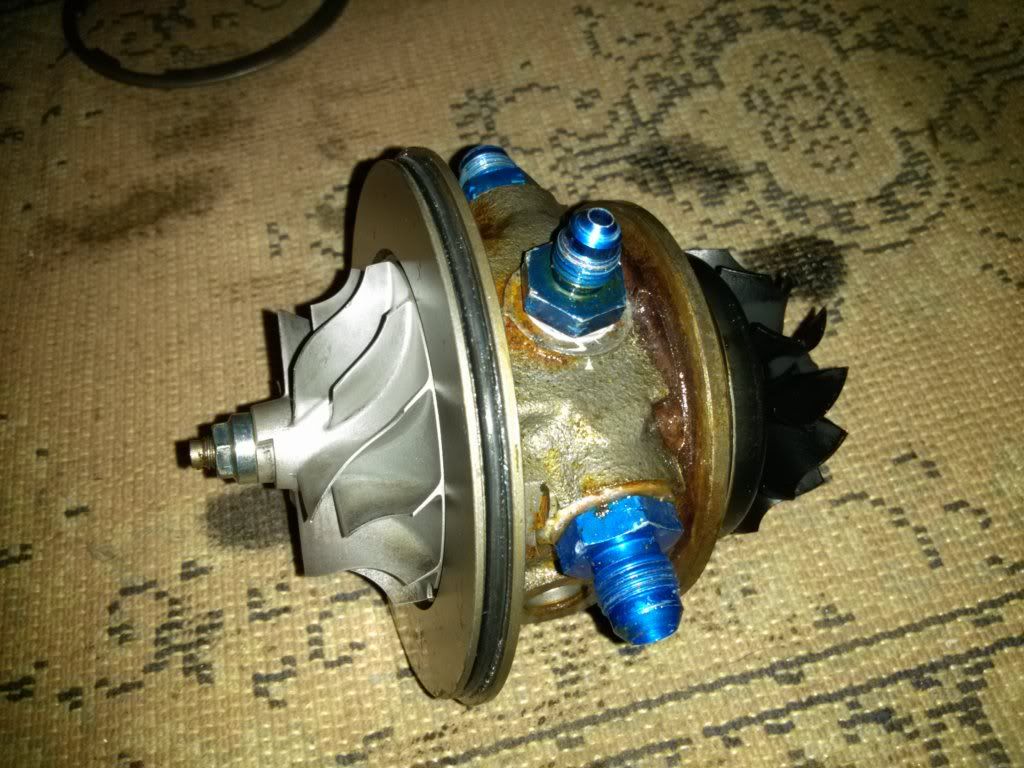
    the next step, is to use your 10mm socket to loosen and remove the clamp holding the turbo housing. after removing the clamp, be careful when you remove the turbine housing. it may require soft taps with a mallet.


    when removed, this is what you should have


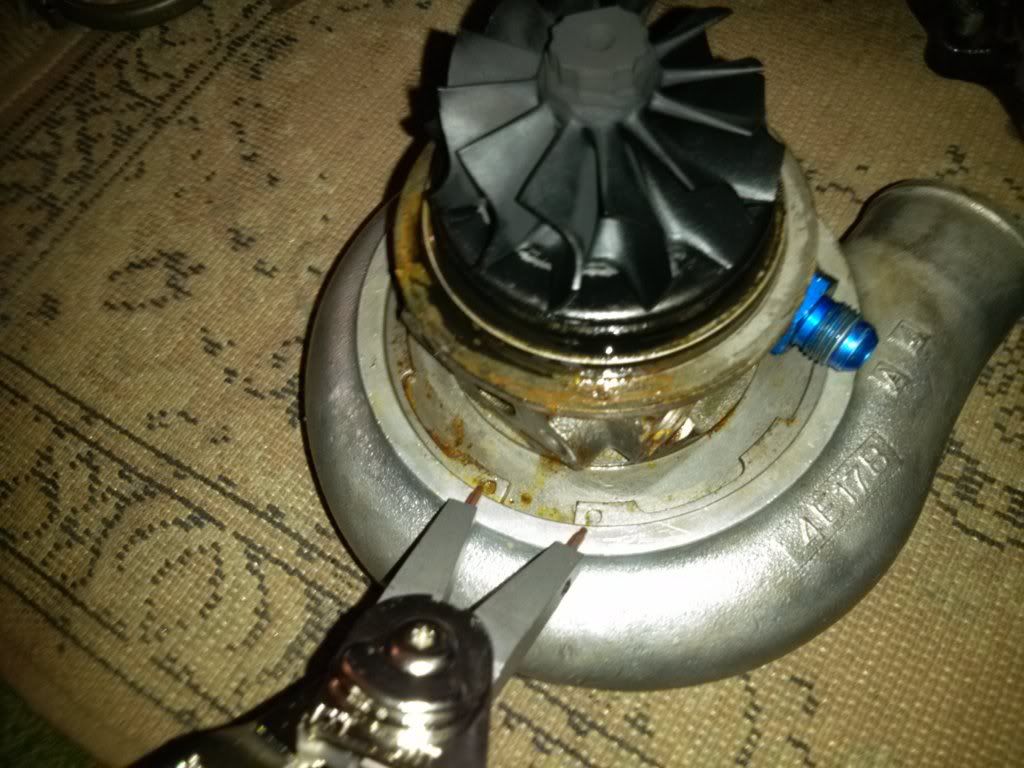
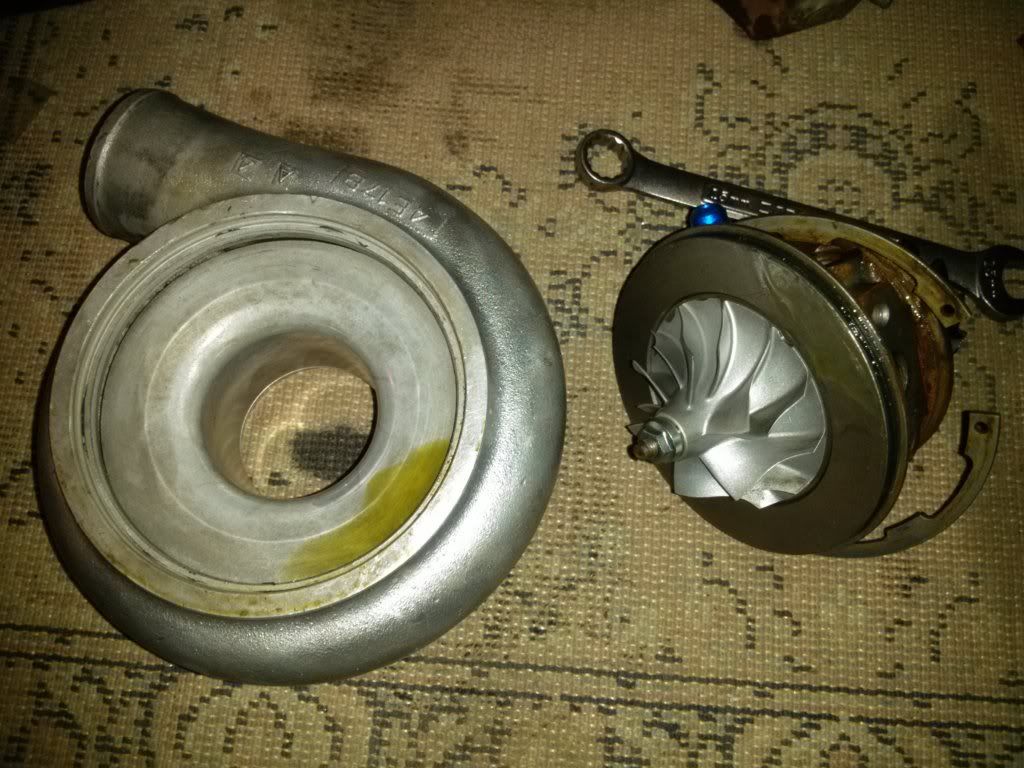
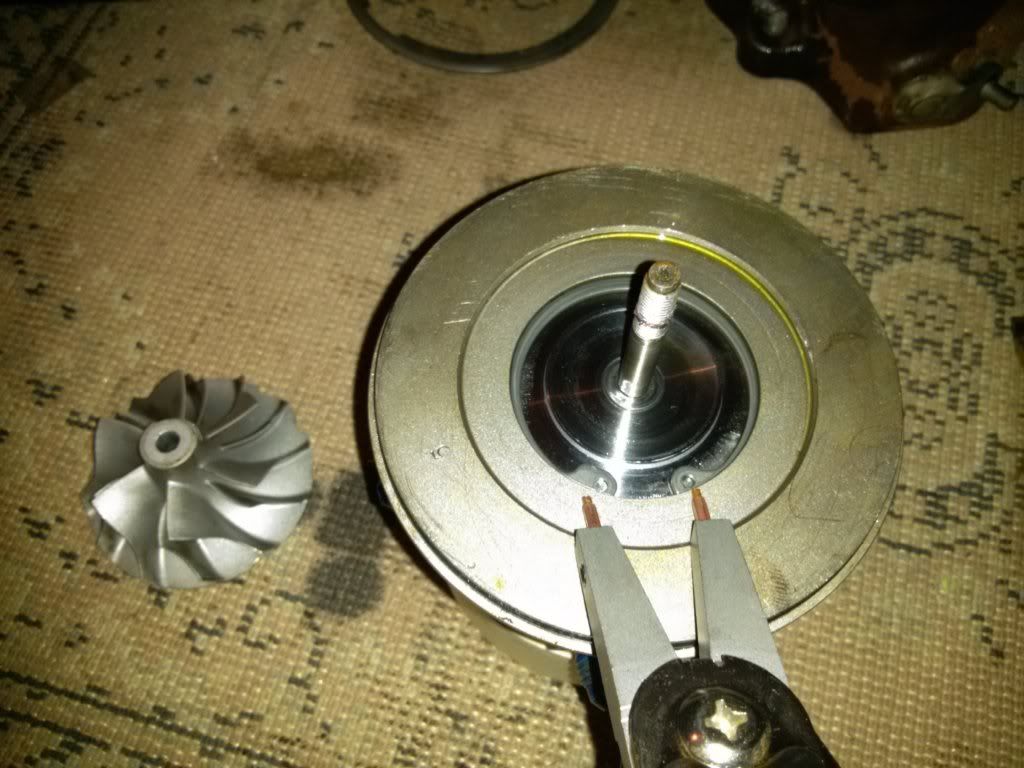
    next, flip it all over. its time to remove the compressor housing. use your snap ring pliers to do this. once the snap ring is removed, you can remove the compressor housing. be careful not to hit the compressor wheel when you remove the housing!


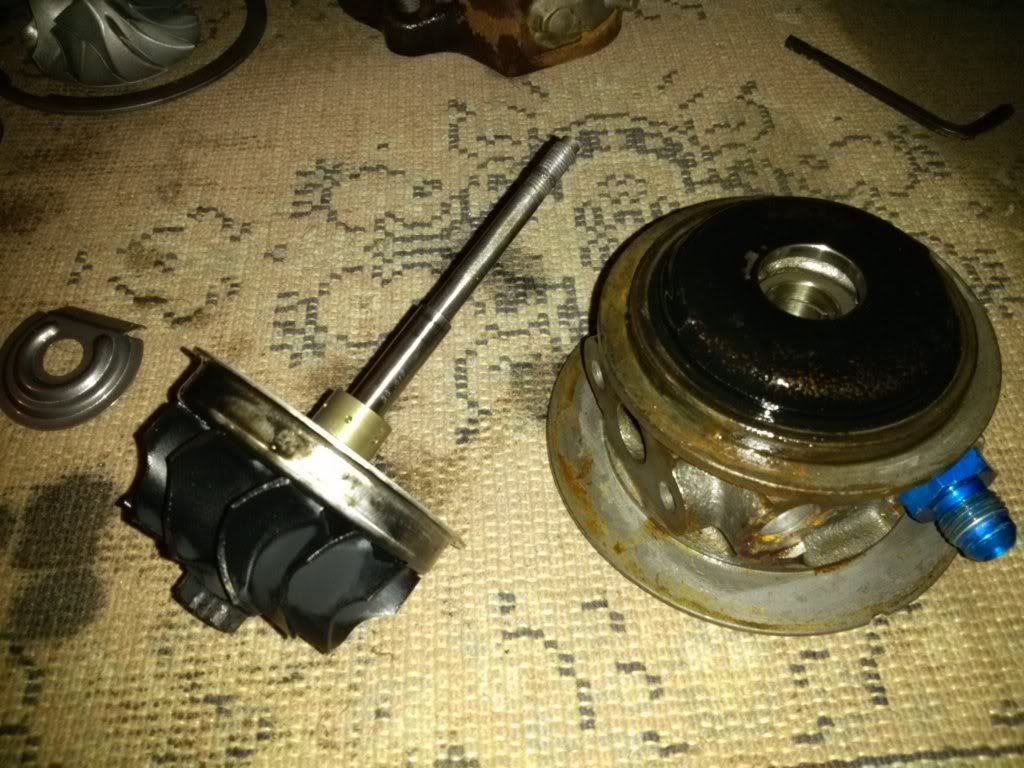
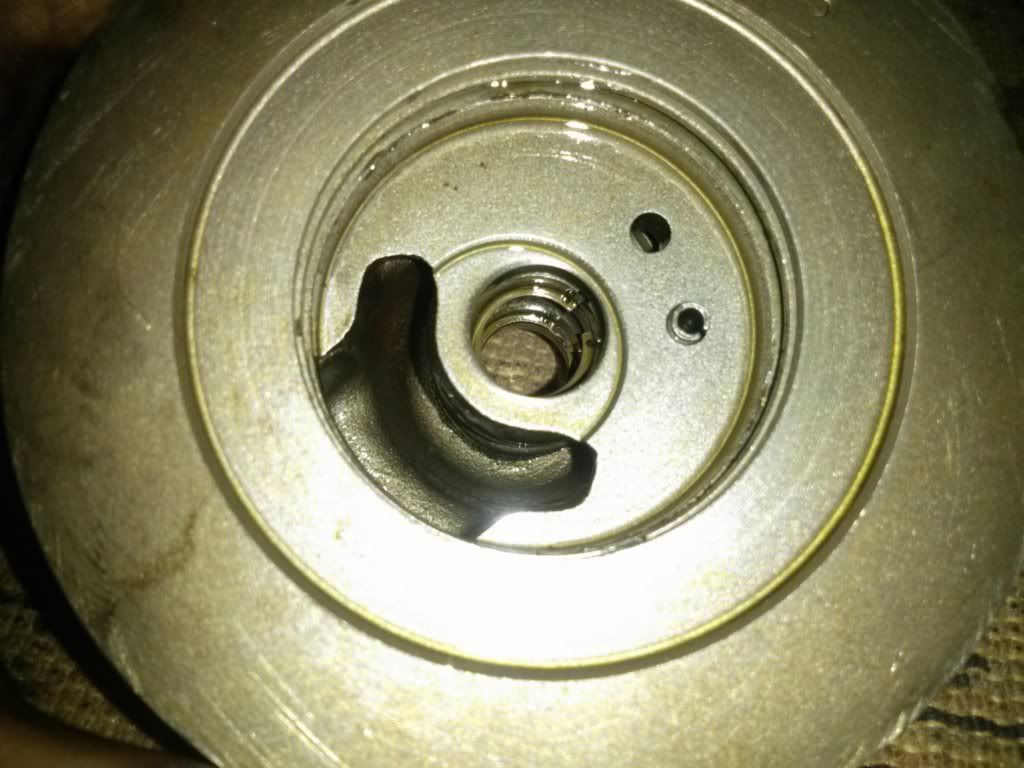
    then you will have your center housing alone

    91 MR2 Turbo
    08 Audi A4 S-line

    Comment

    • Dagazenterprise
      Patron
      • Jun 2008
      • 2172

      #3
      Lookin good
      1993 Cadillac CST-V8 rear mount turbo, 12psi 10.56@123mph and burning up the ozone
      1995 Volvo 850 T5-R, 18psi with flashed ecu and bigger injectors, 315whp
      1973 Chevy Nova with a Volvo B230FT and 4L60E, seriously different.
      1994 Volvo 945, soon to be faster on 15psi

      Comment

      • NHMR2
        ~chris
        • Mar 2011
        • 4750

        #4
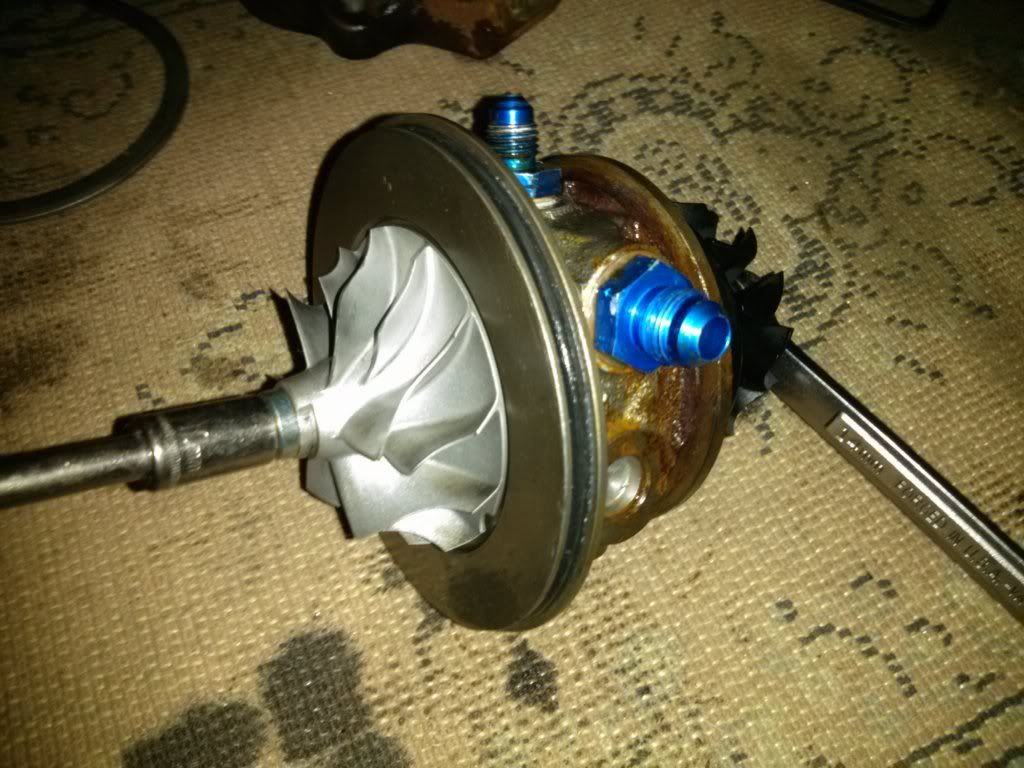
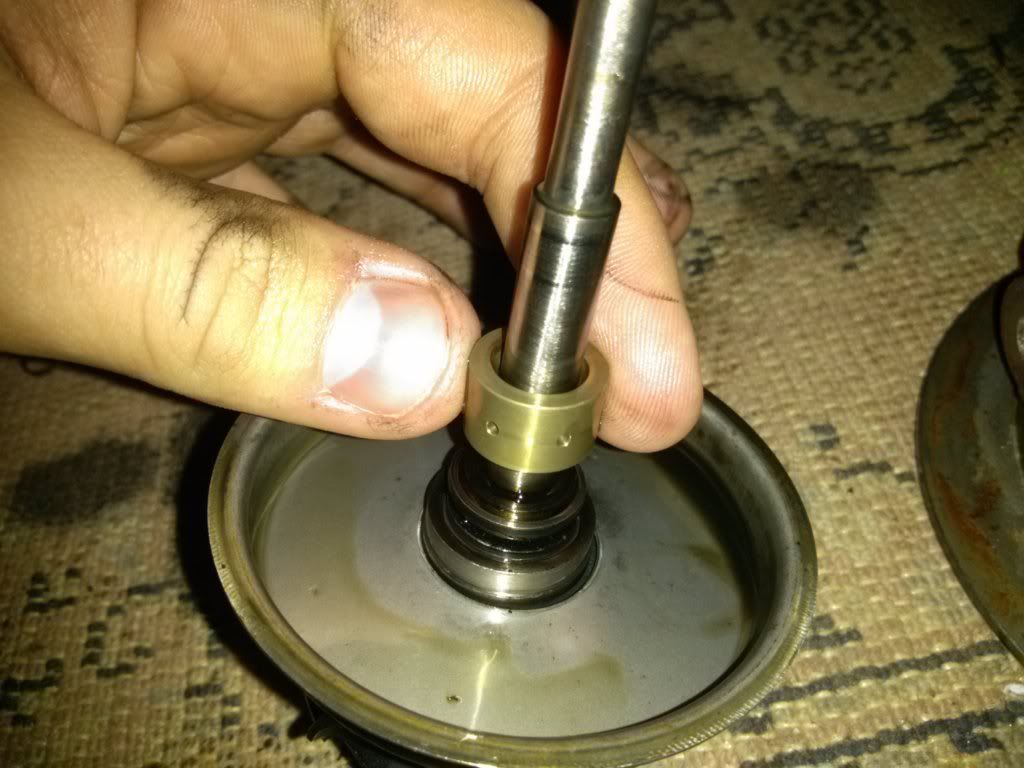
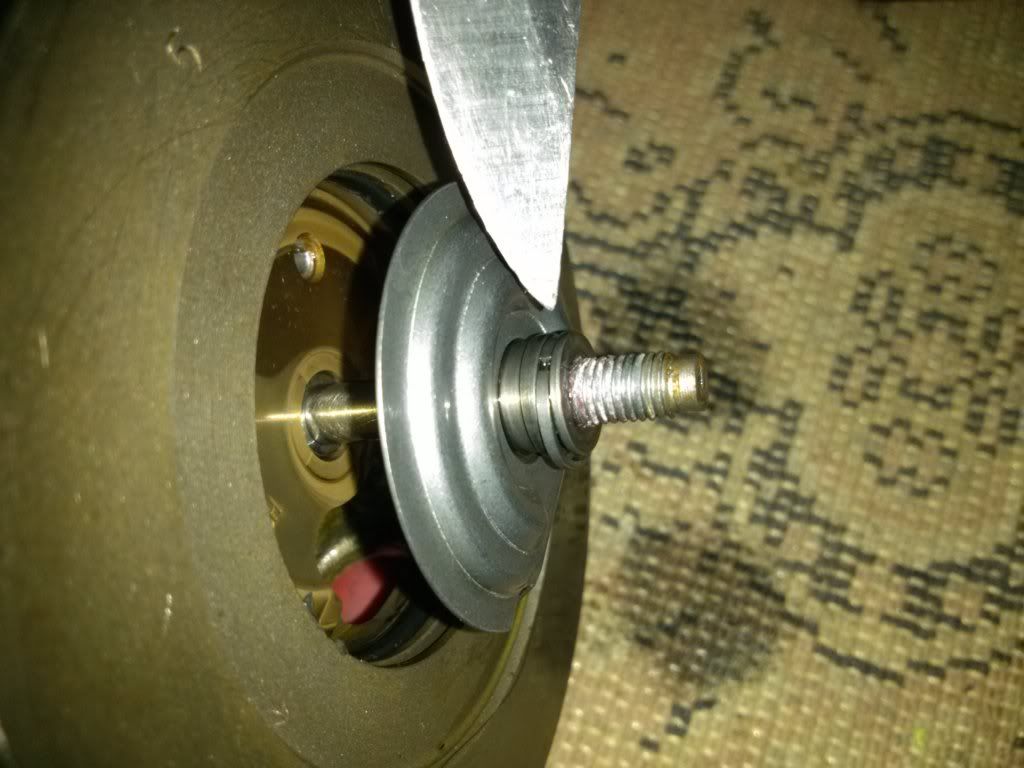
        next, use your 10mm socket or wrench and the (mine was 14mm) wrench or socket on the other side of the turbo shaft. pay attention to which way the threads are going!!! more than likely, the 10mm nut is a reversed thread! so right to losen, left to tighten!


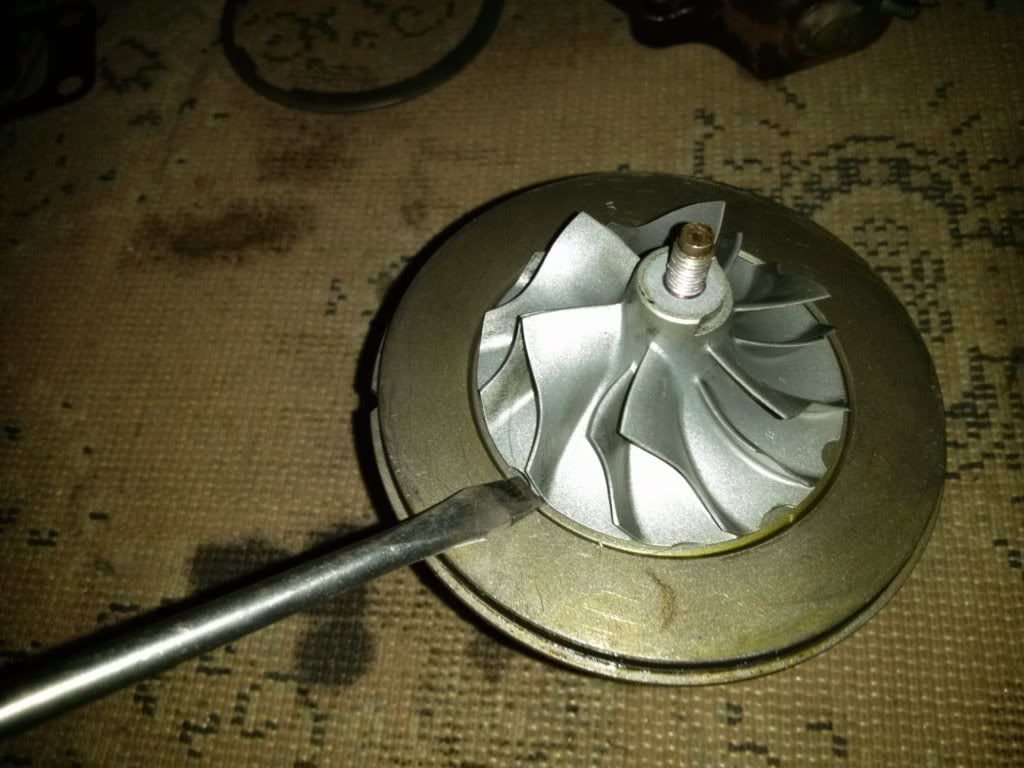
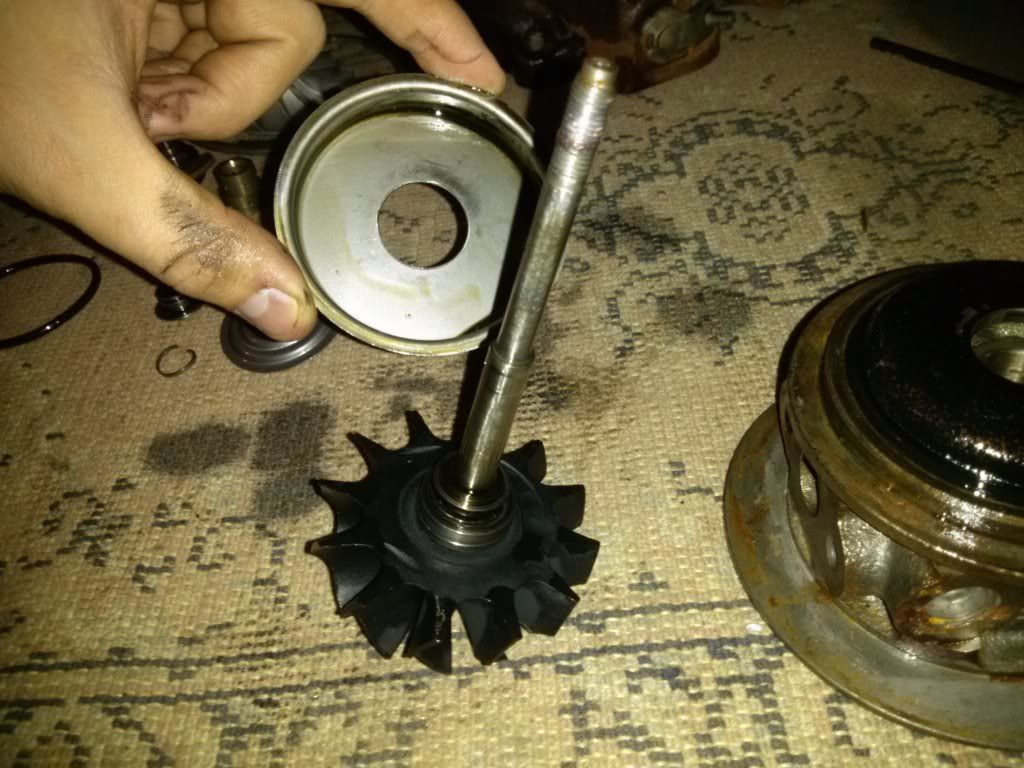
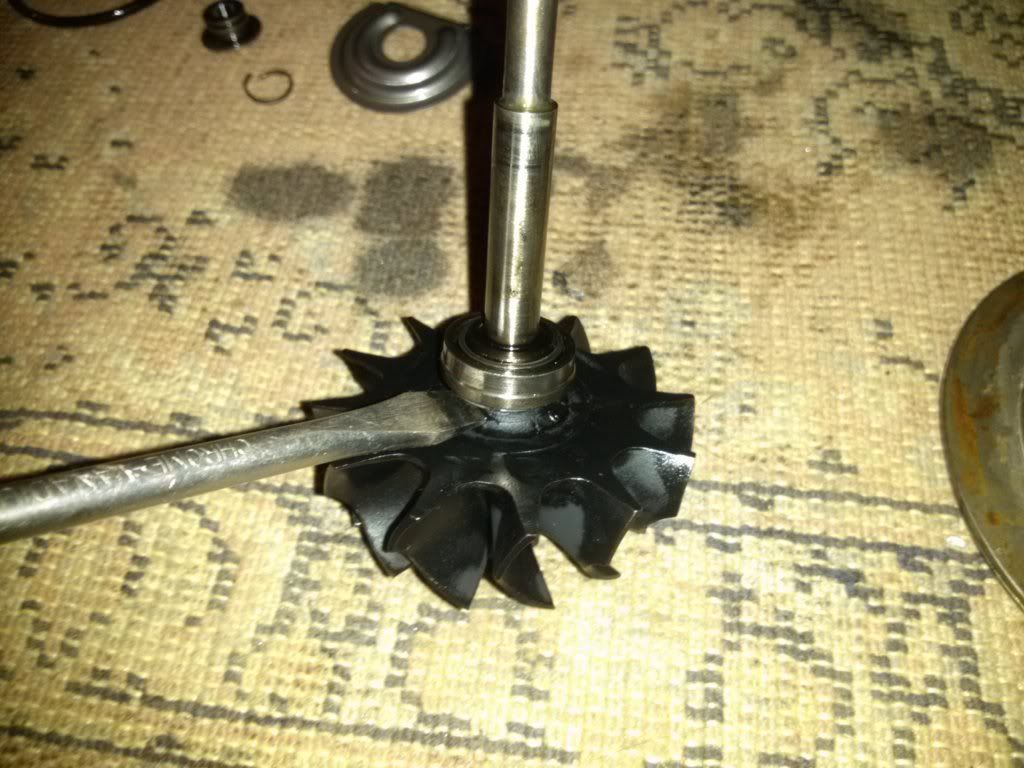
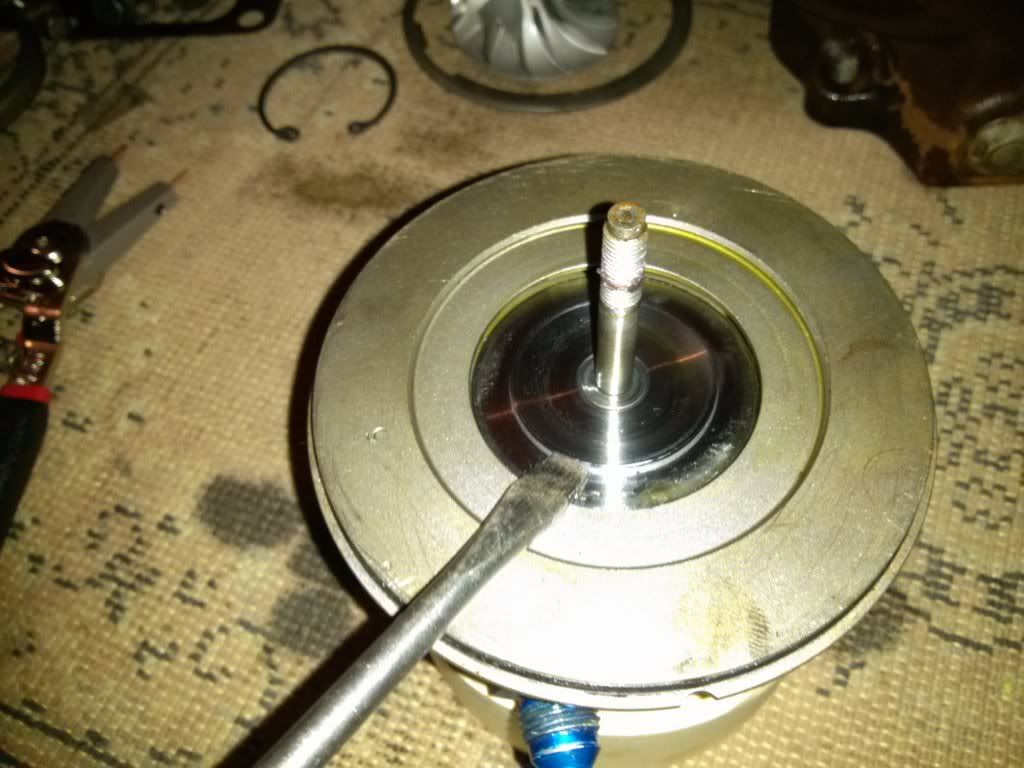
        next, remove the compressor wheel. if you cant pull it off by hand, coax it a bit with the flatblade. BE CAREFUL not to damge the compressor wheel!


        next, slide the turbine and turbine shaft out of the center housing. it should slide out by hand but may need light tapping on the opposite end of the shaft or a light pry from the flatblade.

        91 MR2 Turbo
        08 Audi A4 S-line

        Comment

        • NHMR2
          ~chris
          • Mar 2011
          • 4750

          #5
          next remove the bearing off of the turbine shaft


          then remove the heat shield


          next, remove the turbine seal housing. mine was still attached to the turbine shaft, your may still be in the center housing. if its still in the CH, leave it. its probably fine. but of course, make sure its in good shape and clean.


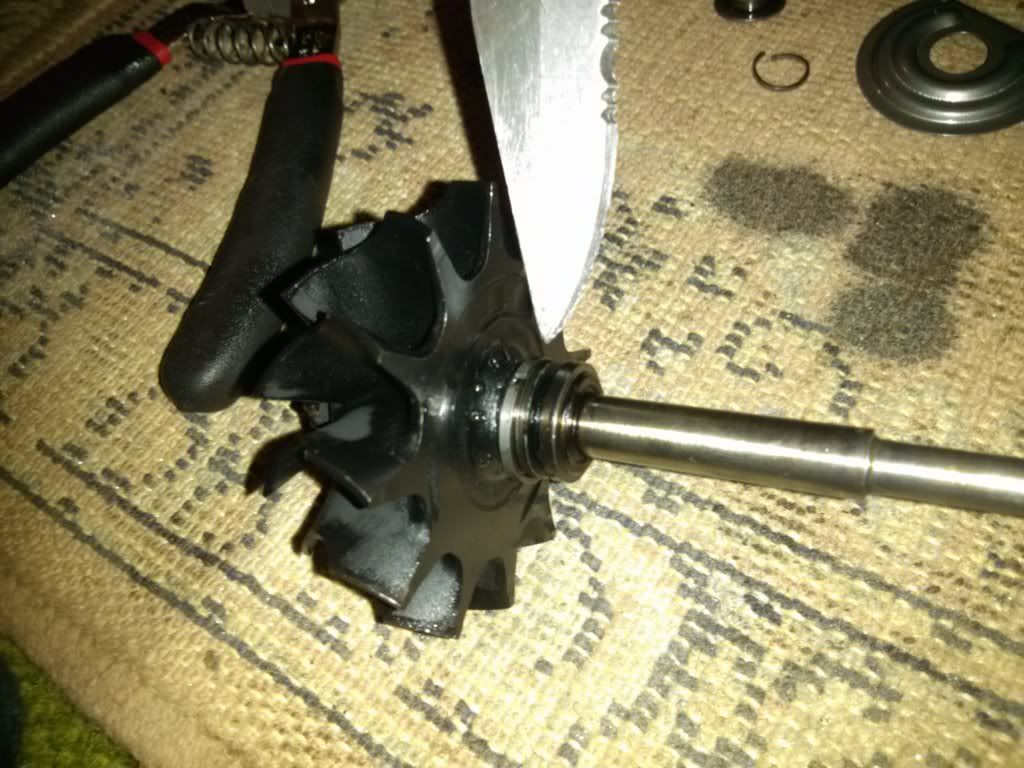
          next step, take the turbine seal off of the shaft by "walking" it out. (lift one side and vice versa to get it out of the groove. heres a pic of where the turbine seal is


          once thats done, turn your attention back to the center housing
          91 MR2 Turbo
          08 Audi A4 S-line

          Comment

          • NHMR2
            ~chris
            • Mar 2011
            • 4750

            #6
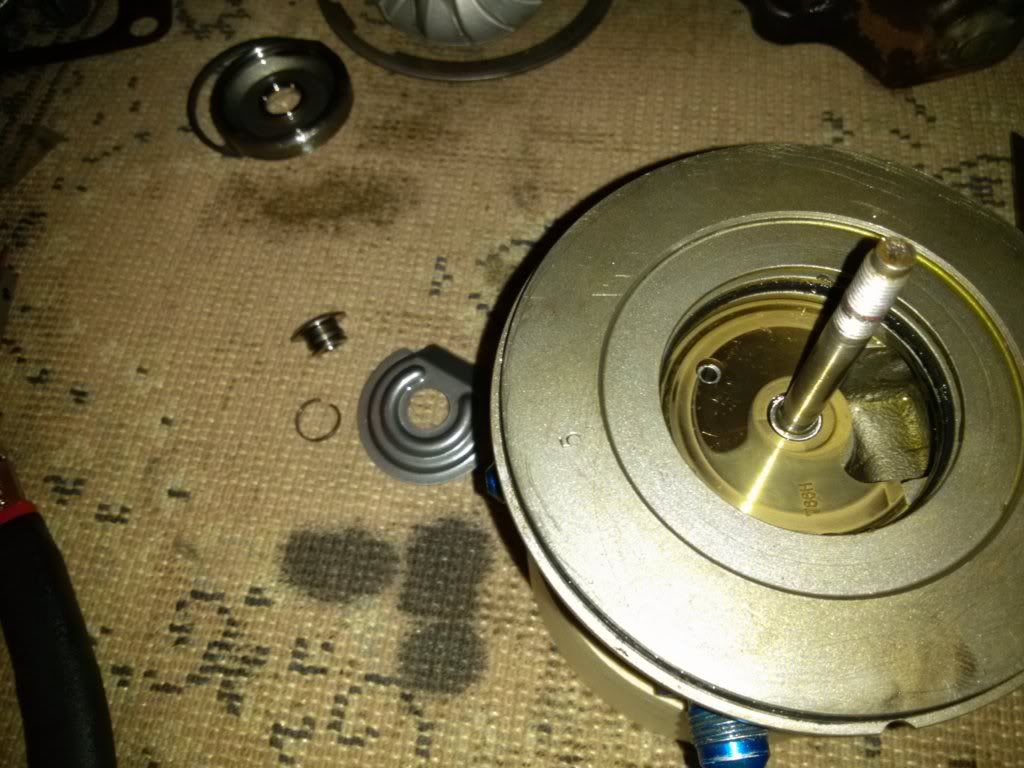
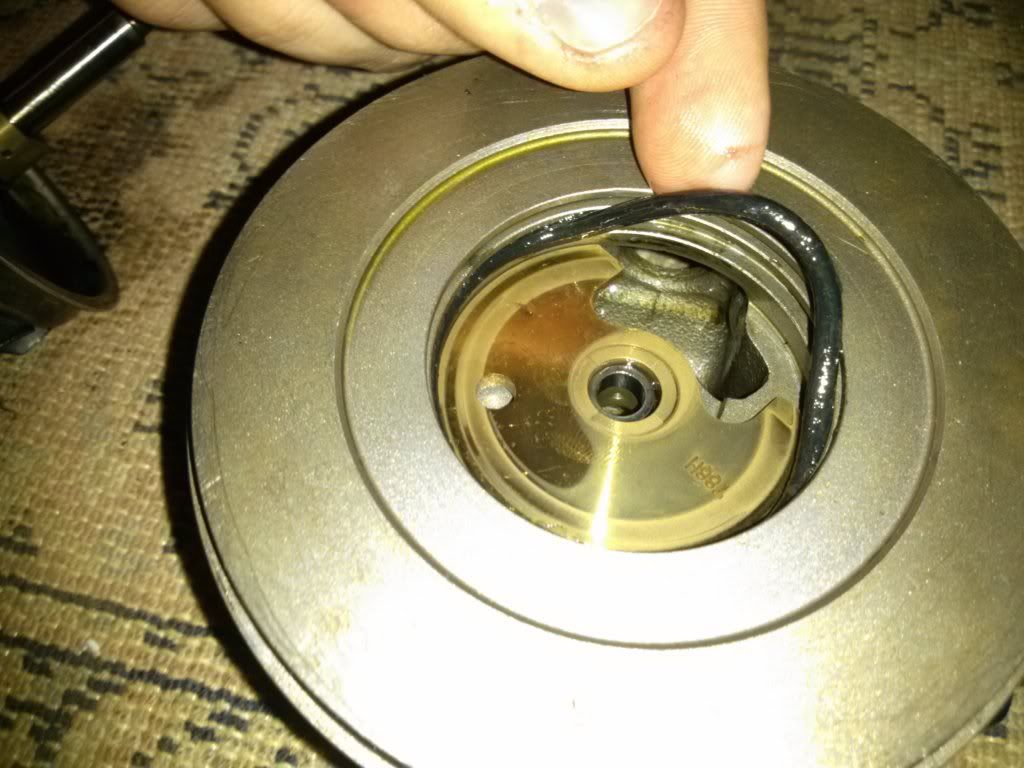
            now, get your snap ring pliers back out, and take out the small snap ring in the Center housing that is holding the oil shield in place.


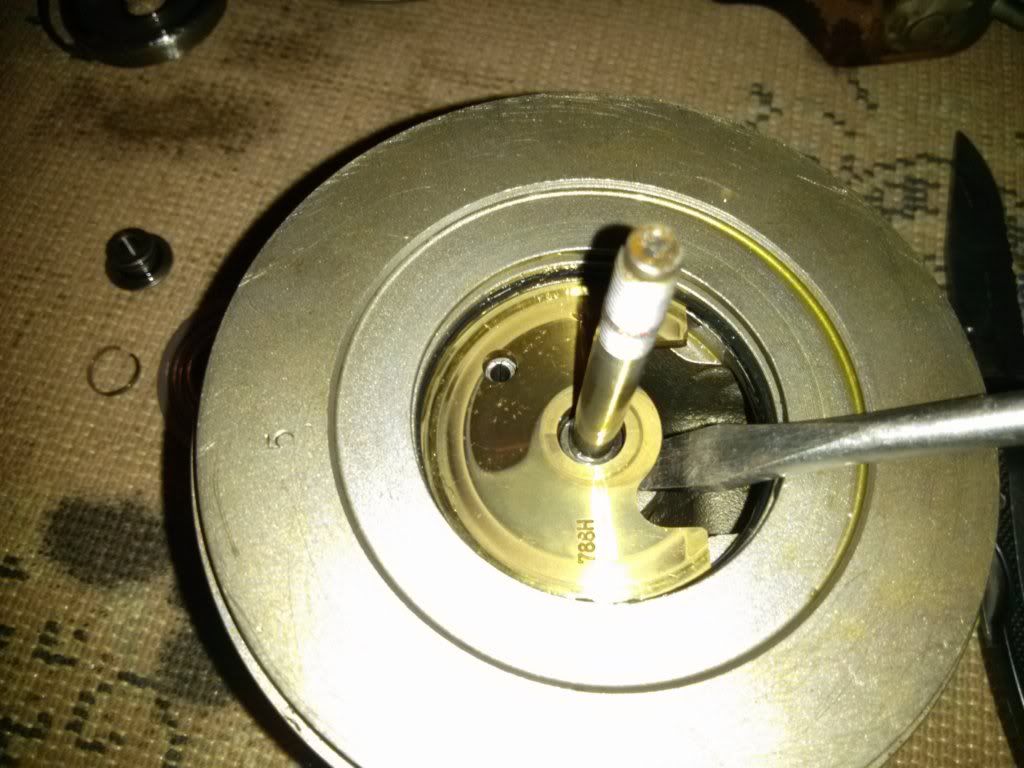
            then being gentle, and working your way around, use the flatblade to lift up and remove the oil shield.


            next youll see the turbine ring and its carrier as well as the thrust bearing. it will likely fall out once you take the oil shield out. walk the turbine seal (piston ring) off of its carrier to seperate the three parts. i removed these things before i took the turbine shaft out of the center housing as you can see in the pic


            when out, this is what you should have

            91 MR2 Turbo
            08 Audi A4 S-line

            Comment

            • NHMR2
              ~chris
              • Mar 2011
              • 4750

              #7
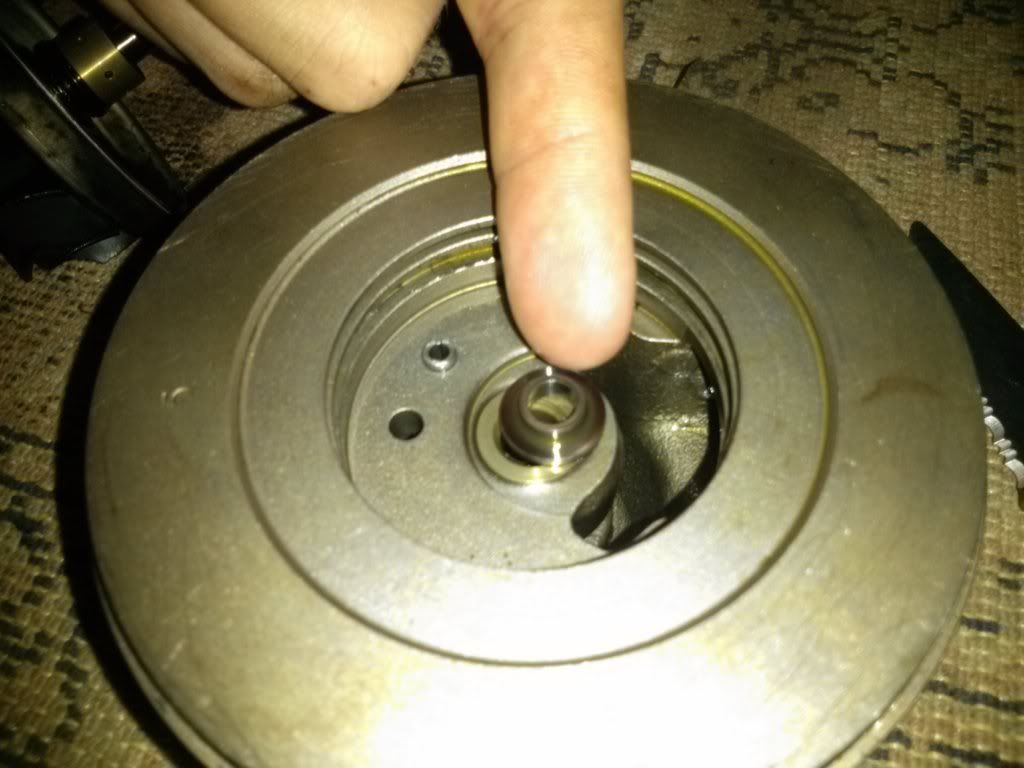
              next step, remove the thrust plate. you may have to remove the oil seal first to get it to slide past. which is fine because you should be replacing that anyways. once again, in the pictures, i had kept my turbine shaft in while removing these parts


              if need be lightly lift up the thrust plate with the flatblade


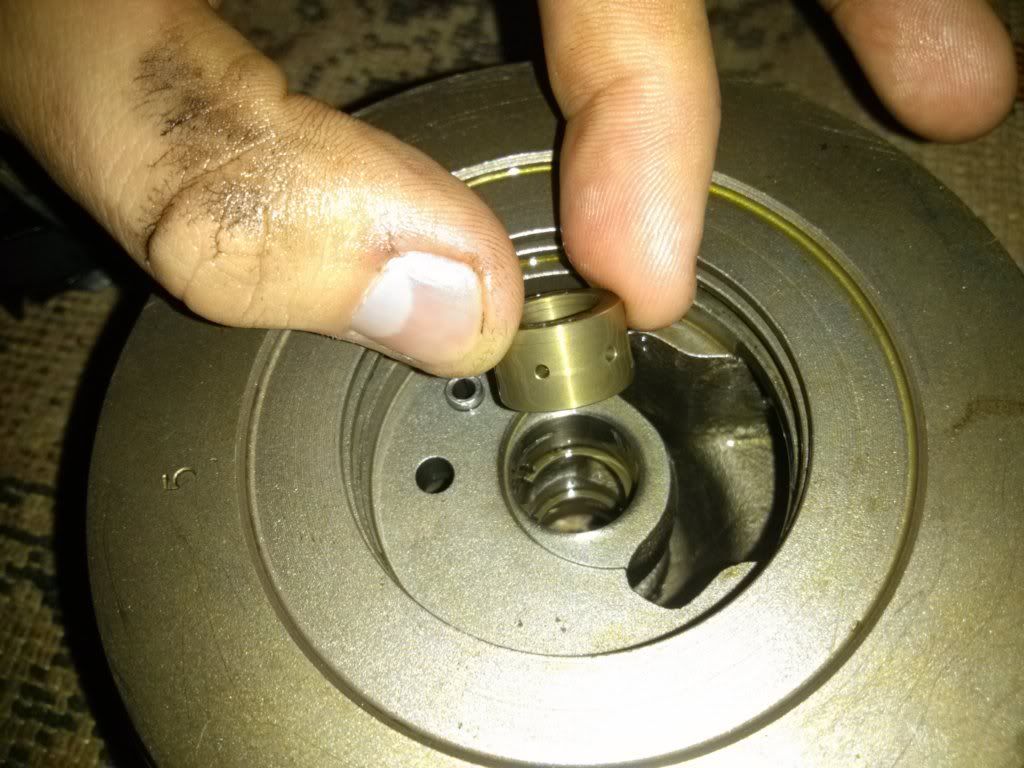
              once removed, take out the thrust plate collar and then the journal bearing behind it. self explanatory really.


              bearing

              91 MR2 Turbo
              08 Audi A4 S-line

              Comment

              • NHMR2
                ~chris
                • Mar 2011
                • 4750

                #8
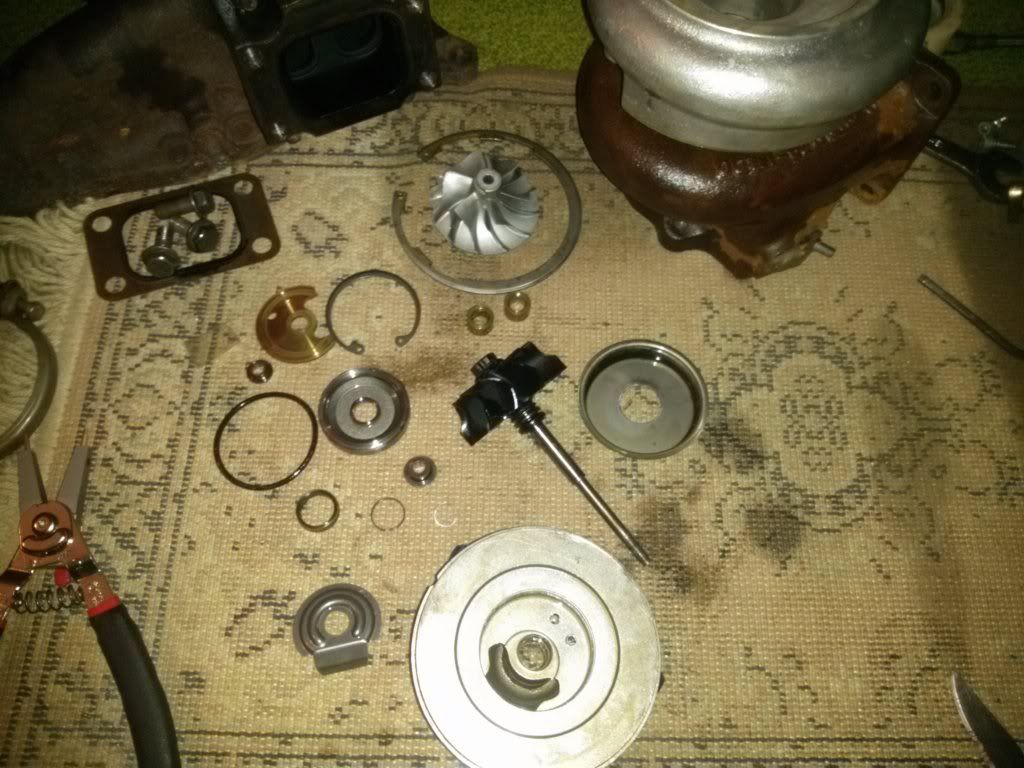
                once its all out you should have a fully torn down TD06. if you want or need to, you can remove the journal bearing retainers which you can see in this next pic. use snap ring pliers.


                once its all out, keep track of everything and where it goes! this is what you should hav e. a completely dasassembled TD06 20G

                91 MR2 Turbo
                08 Audi A4 S-line

                Comment

                • Boosted Euro
                  Admin
                  • Oct 2006
                  • 27801

                  #9
                  Nice write up, gimme that impeller !
                  You ain't got no chance to beat it..like a man with no hands and a one inccchhhh .

                  04 Forester XTI - Built Motor (weisco,eagle,sti,arp) FP Green Hta 330whp
                  83 Rabbit GTI - Scrapped, Heart lives on in the 82
                  82 Rabbit Diesel L custom - full GTI swap , built head lots of Poly
                  90 Corrado G60 - First Love , awaiting winning lottery #'s

                  Anti-Speedbump Society

                  Comment

                  • NHMR2
                    ~chris
                    • Mar 2011
                    • 4750

                    #10
                    you need one?
                    91 MR2 Turbo
                    08 Audi A4 S-line

                    Comment

                    • Boosted Euro
                      Admin
                      • Oct 2006
                      • 27801

                      #11
                      Yea, when I pulled the motor last time I noticed a chip in 1-2 of the blades. Wasn't there when I installed it 2k miles earlier. Sucked something up somehow .
                      You ain't got no chance to beat it..like a man with no hands and a one inccchhhh .

                      04 Forester XTI - Built Motor (weisco,eagle,sti,arp) FP Green Hta 330whp
                      83 Rabbit GTI - Scrapped, Heart lives on in the 82
                      82 Rabbit Diesel L custom - full GTI swap , built head lots of Poly
                      90 Corrado G60 - First Love , awaiting winning lottery #'s

                      Anti-Speedbump Society

                      Comment

                      • ill_eagle94
                        Slow slow slow.
                        • Apr 2007
                        • 4463

                        #12
                        The bearings look good, the seals look a bit iffy though.
                        2017 Subaru WRX Perrin/RallyArmor/Nameless/Fumoto
                        2015 Hyundai Elantra Sport
                        1990 Mazda Miata - 1.8 Swap/M2/XXR/Bridgestone/Flyin' Miata/K&N/Mishimoto/CXRacing

                        Comment

                        • Zoom6
                          Admin
                          • Oct 1985
                          • 5216

                          #13
                          Nice write-up.
                          Owner - Fully Assed Graphics
                          sigpic
                          PM me for vinyl graphics!

                          -Andy - Drunk Crew Member #003


                          Originally posted by EuroTrash
                          I can only imagine the conference calls and work that it took an engineering team to develop butthole seeking technology for this to accurately target a puckered starfish with a warm blast of water.

                          I'm sure a few have PTSD from testing.
                          2006 Mazda6s 3.0L V6 - Click here for my build thread... http://nemotorsport.com/boards/showthread.php?t=12369

                          Comment

                          • Boosted Euro
                            Admin
                            • Oct 2006
                            • 27801

                            #14
                            Should have reserved a bunch of posts so that you could finish without the comments in the middle though.
                            You ain't got no chance to beat it..like a man with no hands and a one inccchhhh .

                            04 Forester XTI - Built Motor (weisco,eagle,sti,arp) FP Green Hta 330whp
                            83 Rabbit GTI - Scrapped, Heart lives on in the 82
                            82 Rabbit Diesel L custom - full GTI swap , built head lots of Poly
                            90 Corrado G60 - First Love , awaiting winning lottery #'s

                            Anti-Speedbump Society

                            Comment

                            • NHMR2
                              ~chris
                              • Mar 2011
                              • 4750

                              #15
                              Originally posted by Boosted Euro
                              Yea, when I pulled the motor last time I noticed a chip in 1-2 of the blades. Wasn't there when I installed it 2k miles earlier. Sucked something up somehow .
                              That sucks. You could probably geta replacement for cheap no?

                              Originally posted by ill_eagle94
                              The bearings look good, the seals look a bit iffy though.
                              Seals are pretty good too. The oil seals (or piston rings) were in question but also looked pretty good. The turbo had zero miles on it.... :/ so everything should be good

                              Originally posted by Boosted Euro
                              Should have reserved a bunch of posts so that you could finish without the comments in the middle though.
                              Ya... Didn't really think about that.. LOL
                              91 MR2 Turbo
                              08 Audi A4 S-line

                              Comment

                              Working...